Every JCM project starts with a really thorough Process Mapping session.
That’s because, without proper processes in place, your CRM will never work as optimally as it could.
With processes in place, your CRM is built around your business and works to automate and optimise the processes you set out.
Processes such as your Sales Process are obvious when it comes to CRM. But what about your marketing processes, project processes, financial processes, regulatory processes, operational processes, internal HR processes? Does your CRM support those processes too?
This is your chance to give your business processes a spring clean and refresh, then look at your CRM and make sure those processes are laid out clearly and are automated where they can be.
Don’t worry if you’ve never done any process mapping before or you feel like you don’t know where to begin. Once you’ve mapped out 1 process, you can map them all! It’s just about asking yourself how do I get from point A to point B.
Here are our 3 simple steps to mapping out your processes:
Step 1
There’s no need to overcomplicate process mapping.
You don’t need fancy software or flow charts to get started.
All you need is a big piece of paper or a bunch of post-its and a pen and you’re good to go! (At JCM we LOVE a big whiteboard!)
When starting out, think of process mapping as a brain dump. How do you get from A to B, and what happens in between?
Don’t get bogged down thinking you need to process a map a certain way.
The most important thing is to get started.
Step 2
Process Mapping is all about asking yourself questions that get you from point A to B. If you’re struggling to get started, just ask yourself the 5 W’s (who, what, when, where, and why (and how!)).
Take your Customer LIfecycle for example. We want to process map each stage, from lead capture to delivery of the service/product, so some questions we might ask are:
Lead Capture
-
- Where do your leads come from?
- What services are they interested in?
- What information do you need to capture?
- How are you capturing that information?
- Who deals with leads as they come in?
- Where and how is the lead information stored?
- How are you communicating with your lead?
- How and when are they converted to an Opportunity?
Qualification
-
- Who is responsible for the prospect?
- How do you communicate with the prospect?
- What are your qualification stages?
- What info do you need to know about the prospect?
- What is your sales process?
And so on and so forth!
That’s just a taste of some questions you could ask yourself to map out your processes.
If you would like a full worksheet to help you get started with mapping out your entire customer lifecycle, just click the button below to download our Free Process Mapping Worksheet.
Remember, the questions are just the kicking-off point! More questions will come to you as you work through your processes, and more ideas will come to light. This leads us to our final step.
Step 3
When mapping out your processes, don’t hold back!
Think about your ideal processes. In a perfect world, how would you like your business to operate? What would be automated?
Don’t hold back on writing down and mapping out exactly what you want for your business.
This is the time to go big.
Then, when you go to implement your processes into your CRM, you’re starting off with the best possible scenario.
Be open to new ideas as you’re working through your processes and ask your team for their input. If you map out areas of the business that you’re not directly involved with, it’s essential you get the involvement of someone who will be following those processes day in and day out.
More often than not, they have great ideas of how things can run smoothly.
So, those are our 3 steps to process mapping your business. Now, all that’s left is to get started.
There is no one better qualified to process map your business than you, so get stuck in and make your business your own!
Once you have your processes, now it’s time to make sure your CRM is working to optimize those new processes. Remember, a good CRM system should work FOR your business, like your best, most hardworking employee! Make sure you’re telling your CRM what to do, and not the other way round.
To help you make some changes in your CRM, here are some really simple steps to show you how to change the layout and add, amend or delete fields within the modules of your CRM.
*Note: if you already have automation in place, and you’re making changes to your modules, make sure you’re not deleting anything that will affect a pre-existing workflow. A message will appear in Zoho informing you if this is the case before you can delete the field.
Step 1
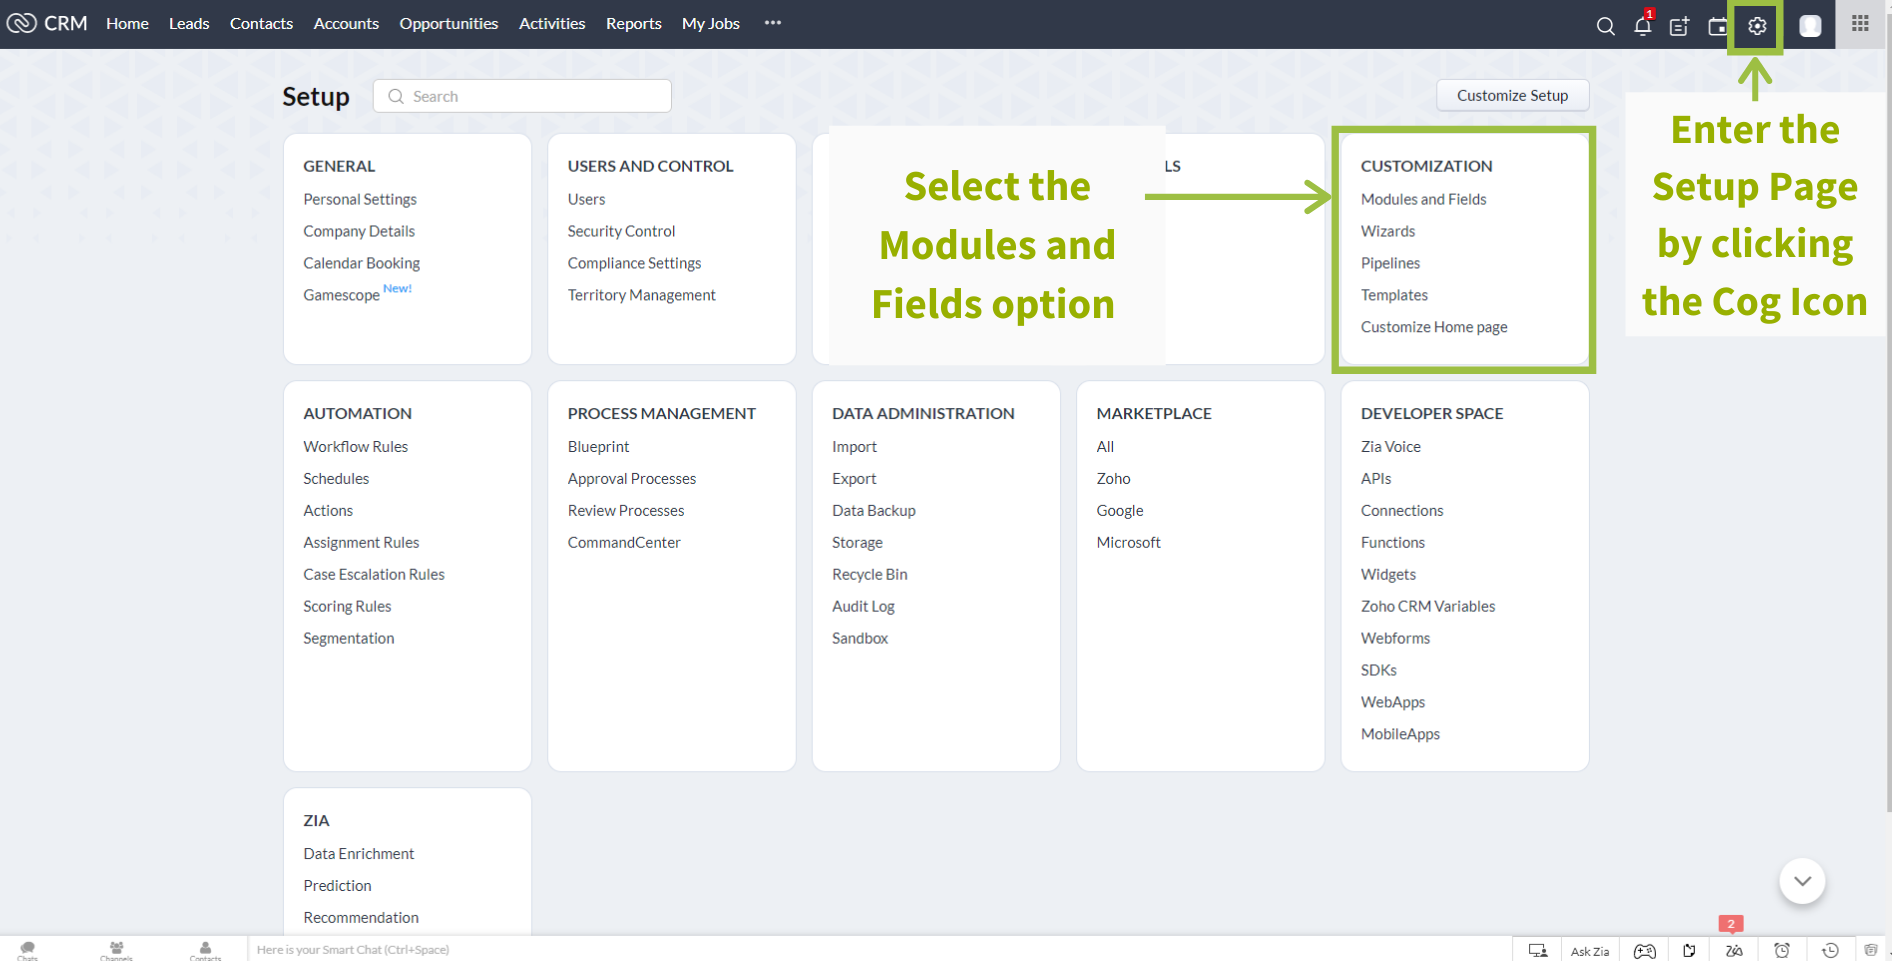
Click the cog icon in the top right of your screen to access the setup page.
Under the Customisation section, select Modules and Fields.
Step 2
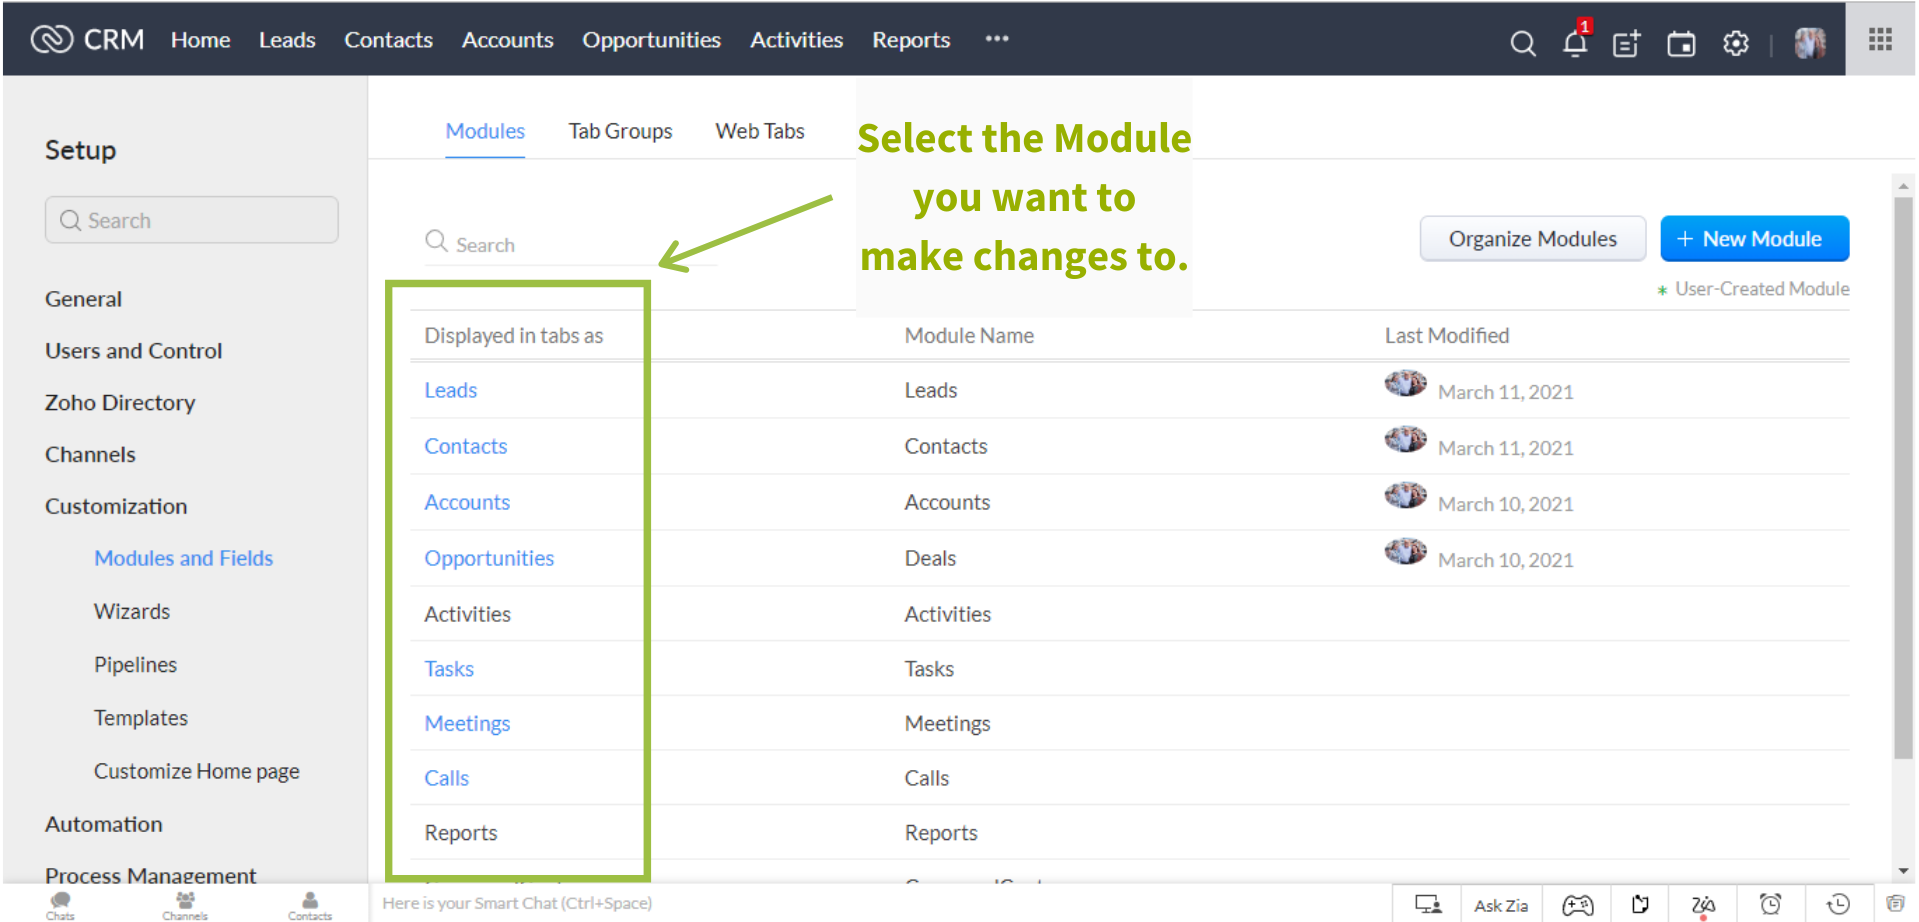
Choose the module you want to make changes to and select the layout from within that module. Layouts are how you view the fields within the module, and you may have multiple layouts per module for each role in your organisation (for example, your Sales team might have a different layout to your Admin team). All systems come with a Standard layout, so if that’s the only option you can see, go ahead and select that.
Step 3
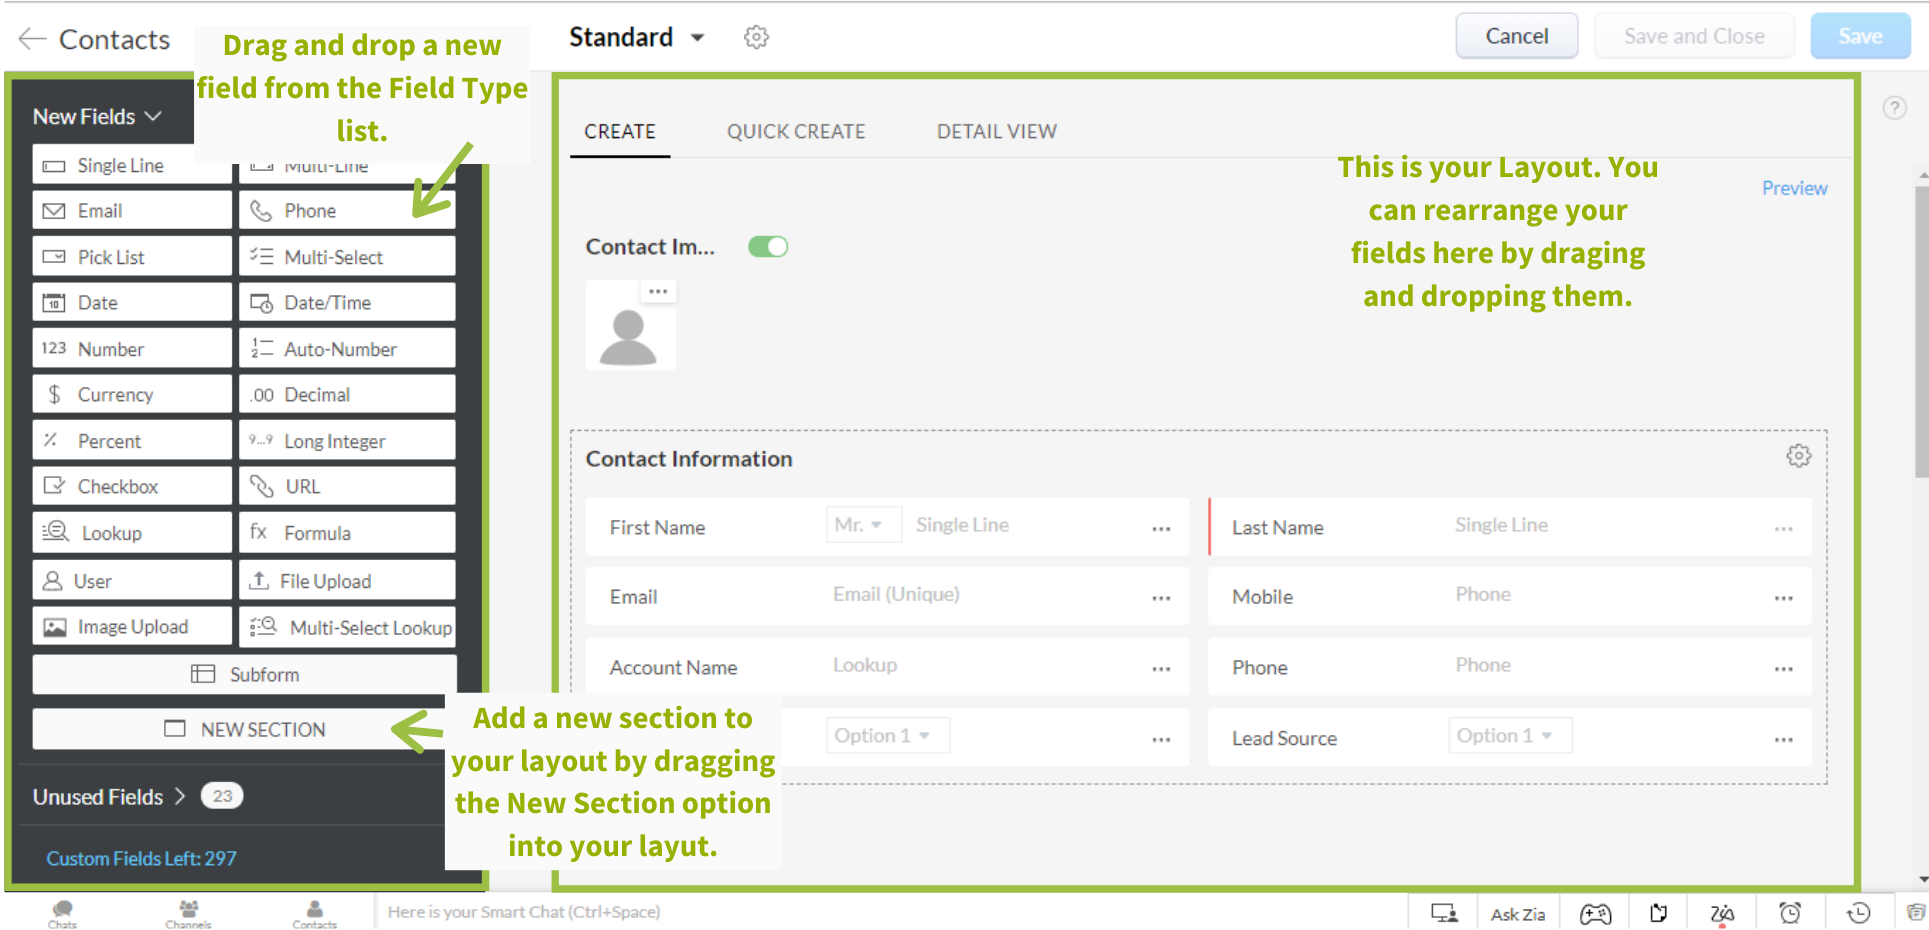
Welcome to your editing screen! From here you can edit the layout of your module, add new fields and amend existing fields. On the left-hand side, you have each of the Field Types. To use a field type, just select it from the panel on the left-hand side and drag it over to your layout. You can move fields within the layout too by just dragging and dropping them.
On the left-hand side, you also have your sections. You can split the data in your module up into sections to help with organisation. Again, to add a new section just drag and drop the section from the panel on the left, over into your layout.
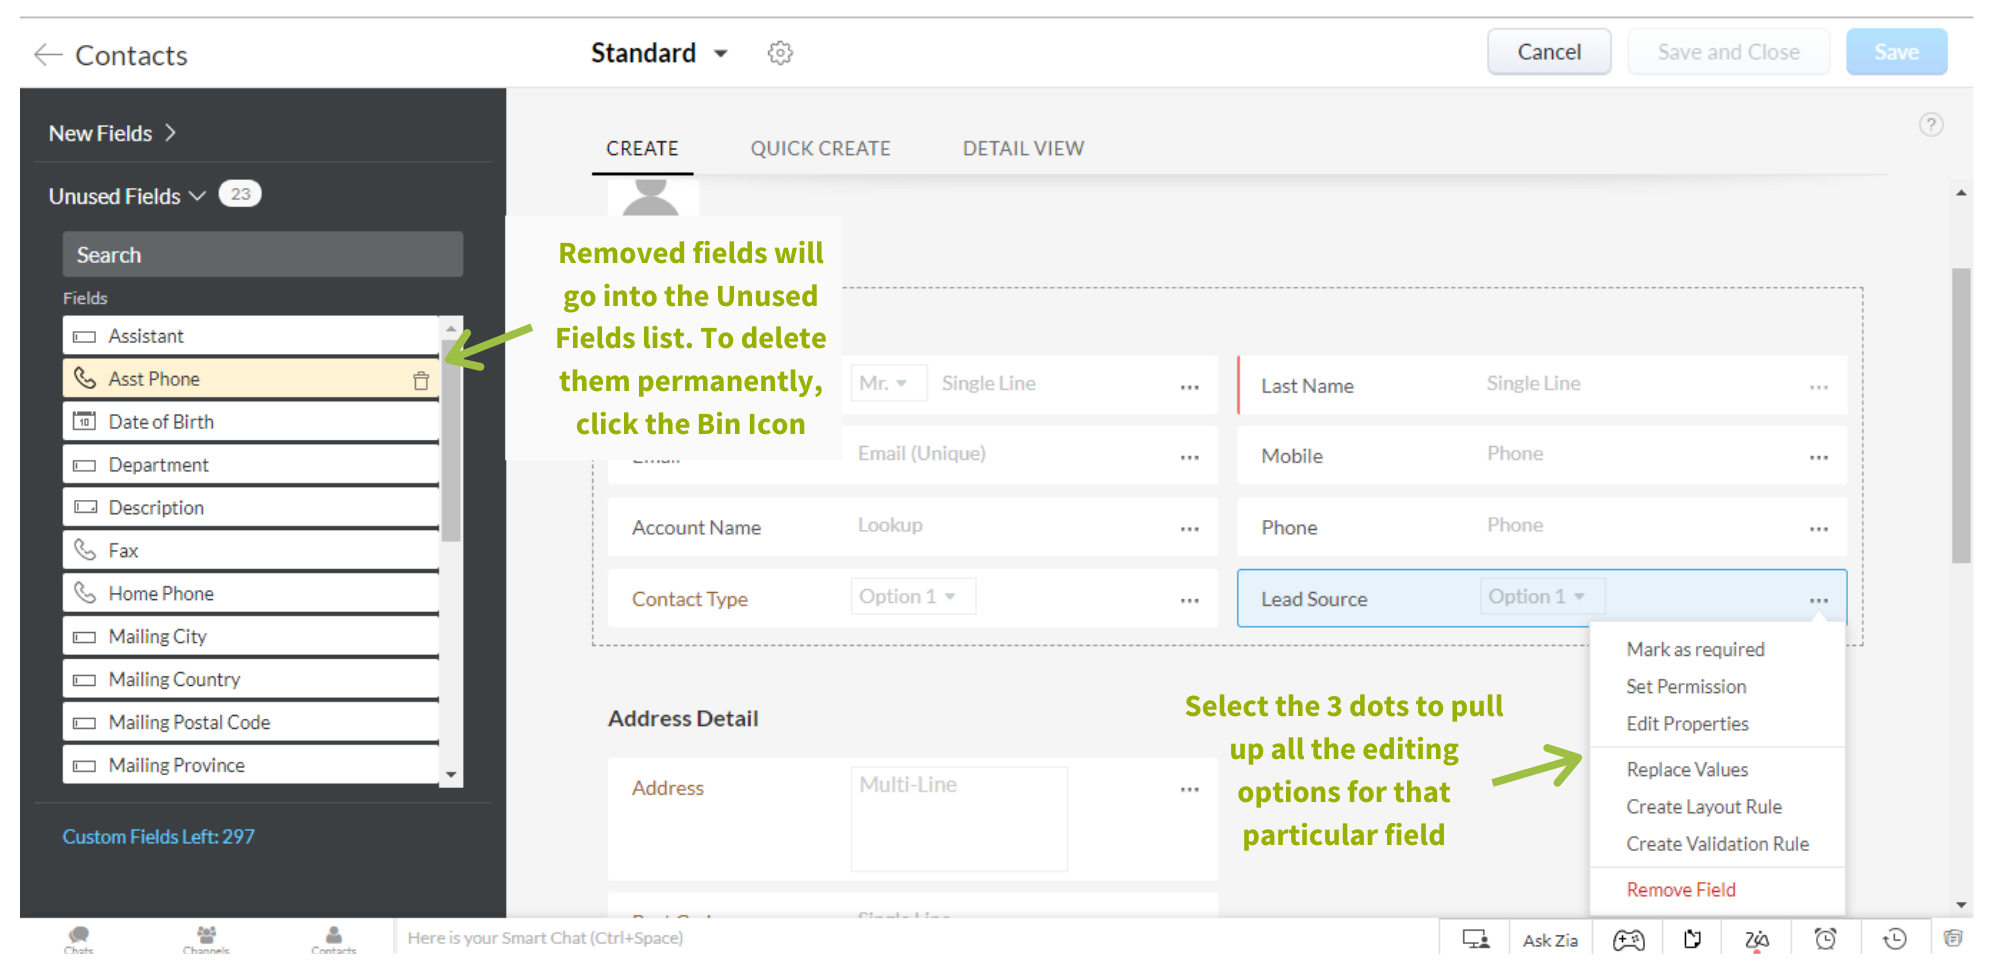
To make an existing field mandatory, edit its properties or delete it, head to the field and click the three dots on the right-hand side. From here, you have all your editing options for that field.
*Note: Fields that you remove from the layout move into the Unused Fields tab on the left-hand side. If you need to bring that field back, just open that section and drag it back into the layout. If you need to delete it permanently from the system, open that section up and click the bin icon on the right-hand side of the field.
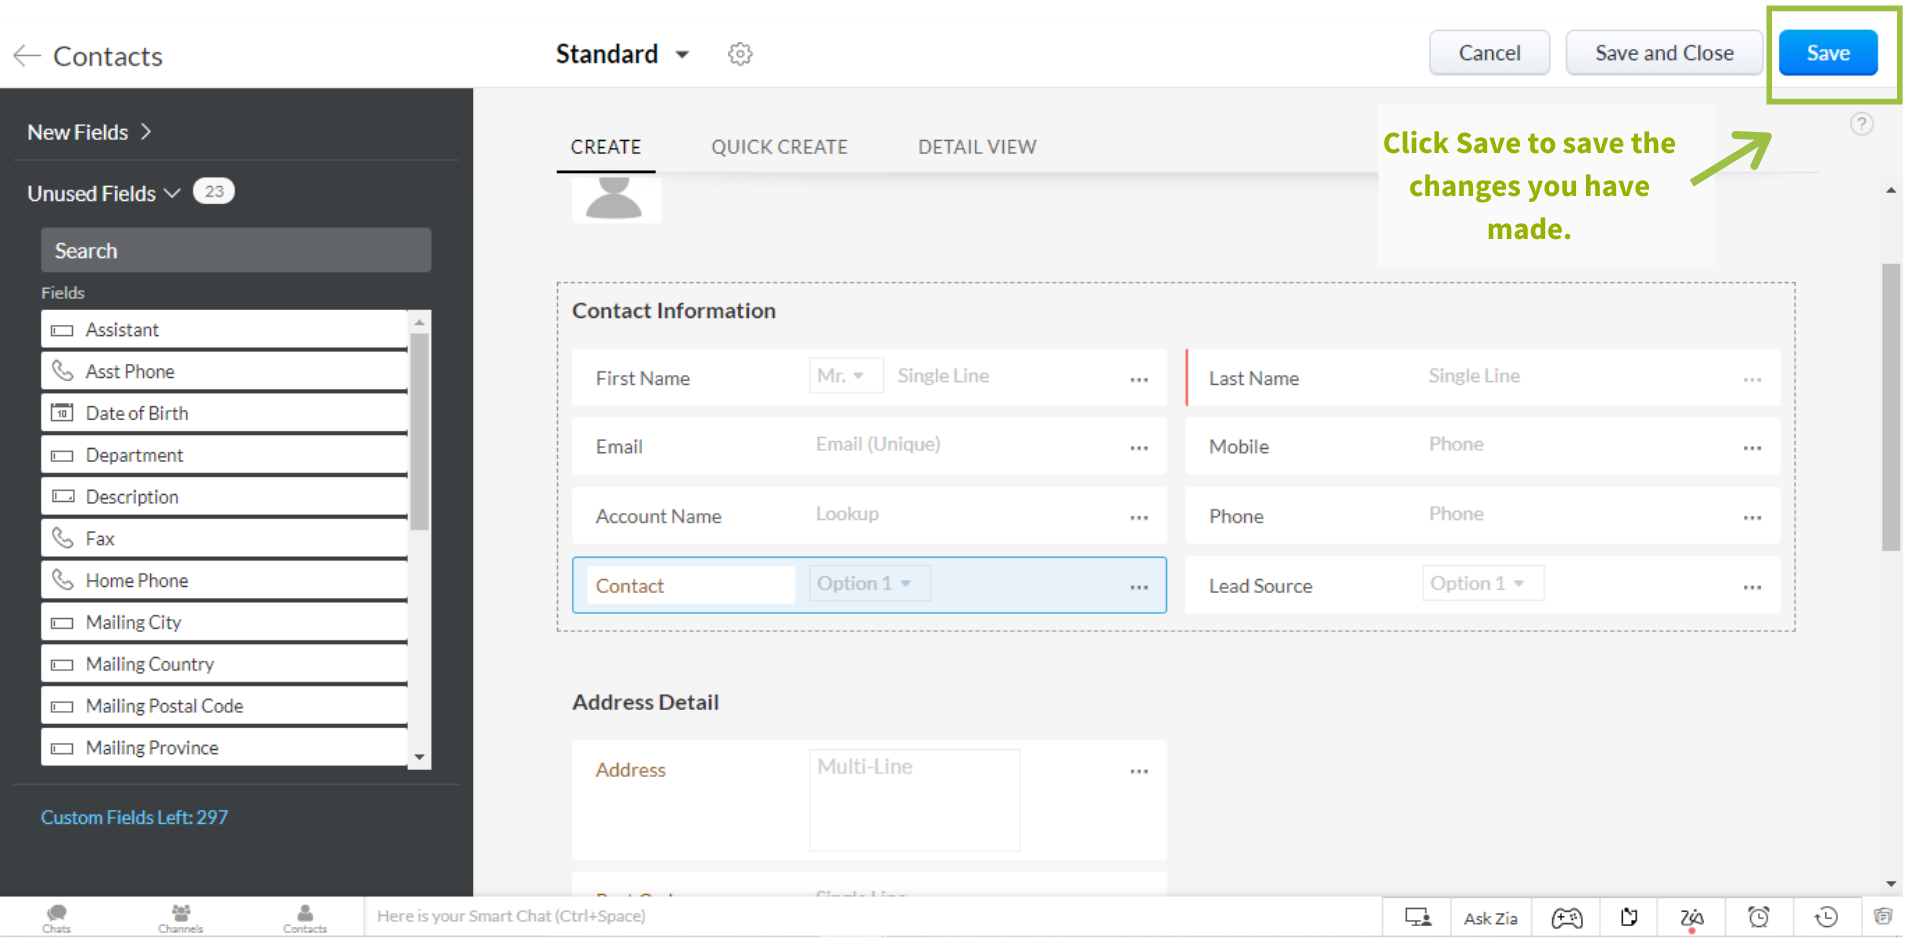
Step 4
Once you’ve made the changes you needed to in that module, click Save and the changes will immediately be reflected in your CRM (you may need to just refresh the page to see the changes once you’ve saved your work!). Now you’ve updated your system to your new processes, you may need to go and use some of the mass actions outlined in this blog to update the existing data in your system.
And that’s all there is to it!
Process Mapping really is such an important part of running a business and having a CRM system that implements those processes will make your life so much easier!
If you would like access to a video of how to make changes to your modules within Zoho CRM, click the button below to join our FREE Zoho Manchester User Group over on Facebook. We post training videos exclusively to the group, so go ahead and join if you think you would benefit from them.