Now more than ever, how we communicate with our clients and making sure we keep up to date with our clients is so important. Unfortunately though, when people start to clean out their CRM, they overlook giving their comms a quick spring clean.
When was the last time you checked that your team’s emails were synced up properly? Or checked what email templates you have going out to clients? Have you got an email template folder full of draft, half-finished emails taking up space?
So today’s blog is going to give you the opportunity to give all your comms a good spring clean.
If you would like to watch a training video that takes you through Email Configuration and Email Templates, click the button to join our Zoho Manchester User Facebook Group.
Firstly, let’s look at making sure your team’s emails are synced up to your CRM. If your team is dealing with clients via email, it’s vital that those emails are captured in your CRM so that all your client’s project details are held in one central space.
So first go ahead and check whether your user’s emails are synced (this is for Admin users only)
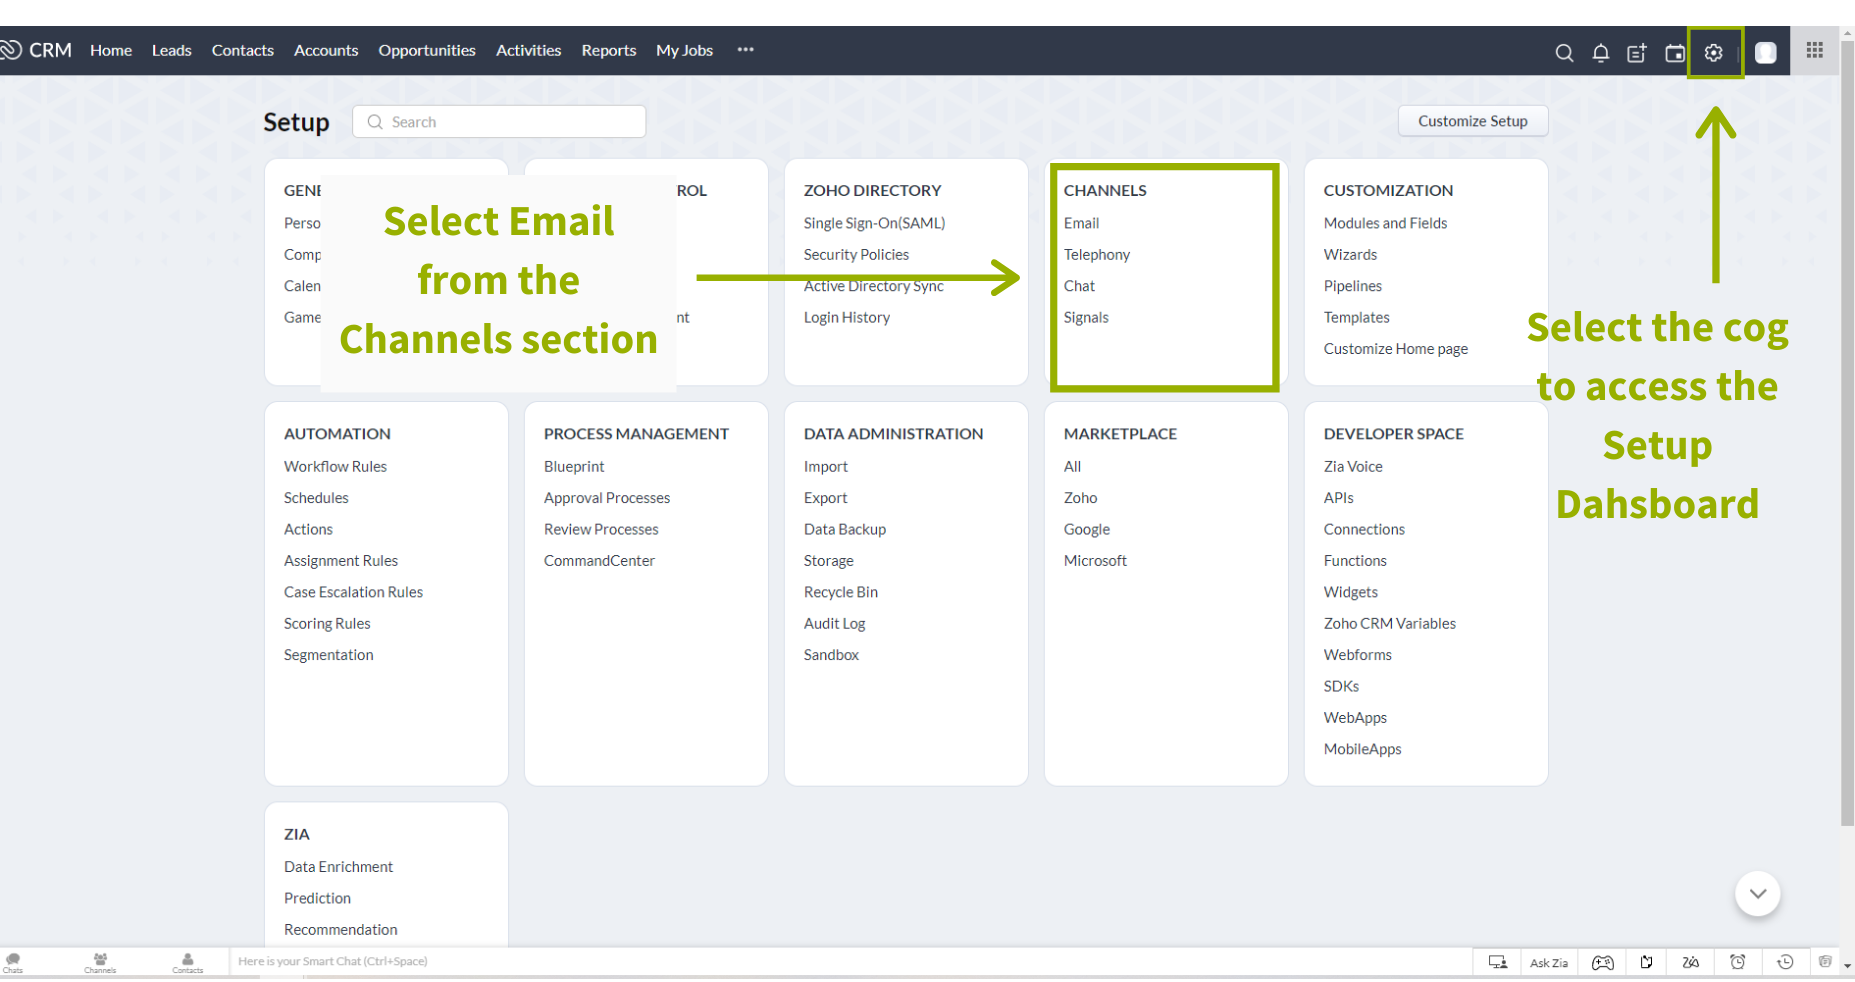
- Head to the Setup panel by clicking the cog at the top right of the screen.
- Under Channels, click Email. This will open up your own email configuration page.
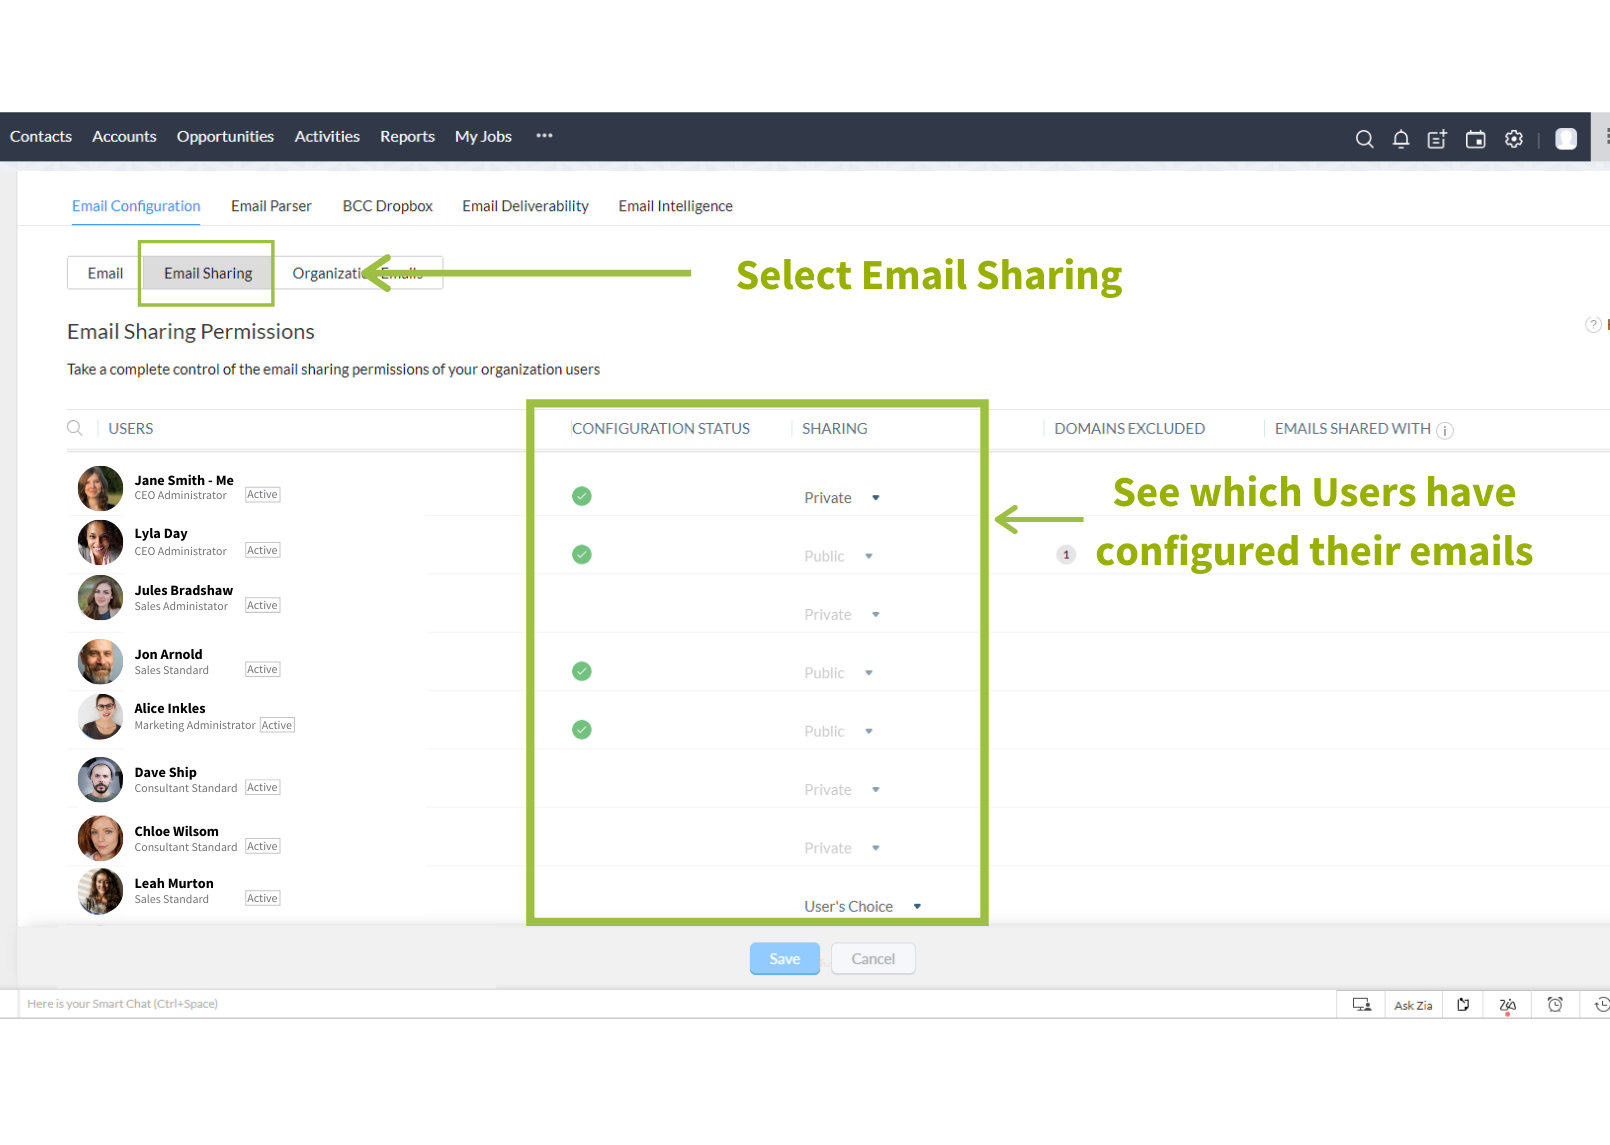
- From here click Email Sharing. This will give you a view of who has configured their emails and what permissions they have set.
If someone in your team doesn’t have their email synced, here’s how they can configure them. Email syncing has to be done by the user themselves.
- Ask the user to open up their Zoho CRM and click the cog in the top right to enter the Setup Dashboard.
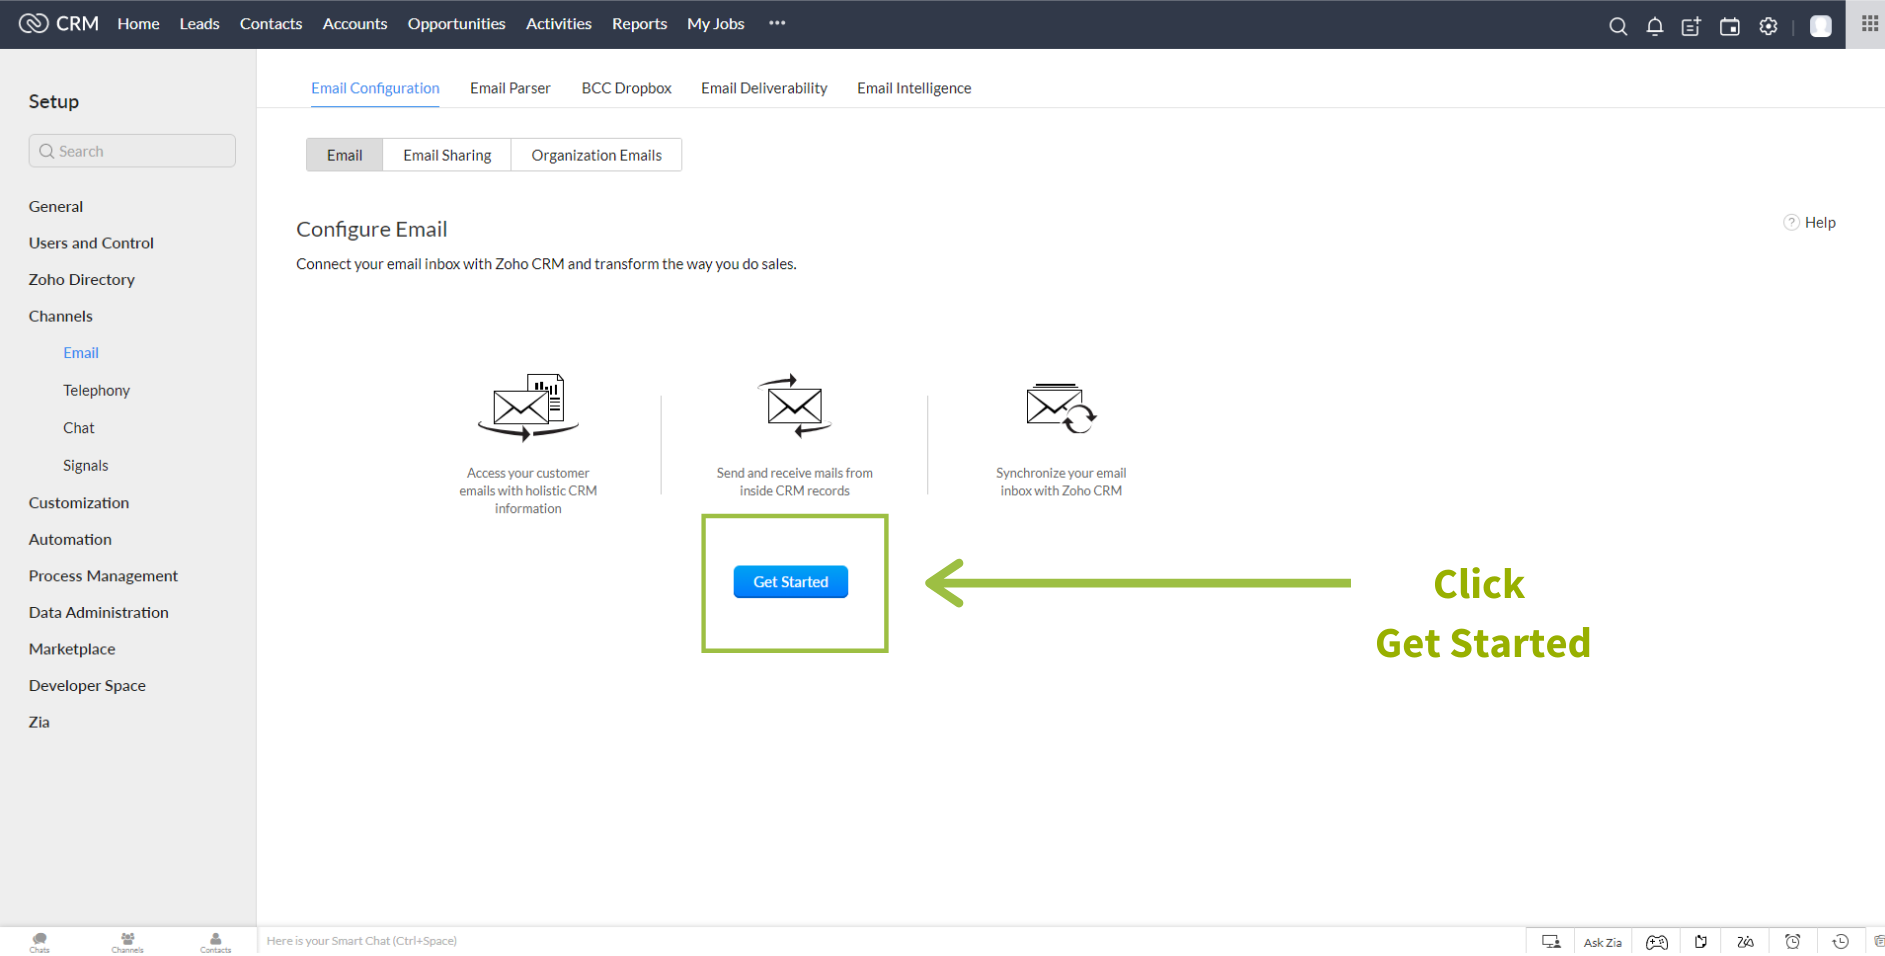
- From there ask them to select Email from the Channels section. This will take them to a get Started page, where they will click Get Started.
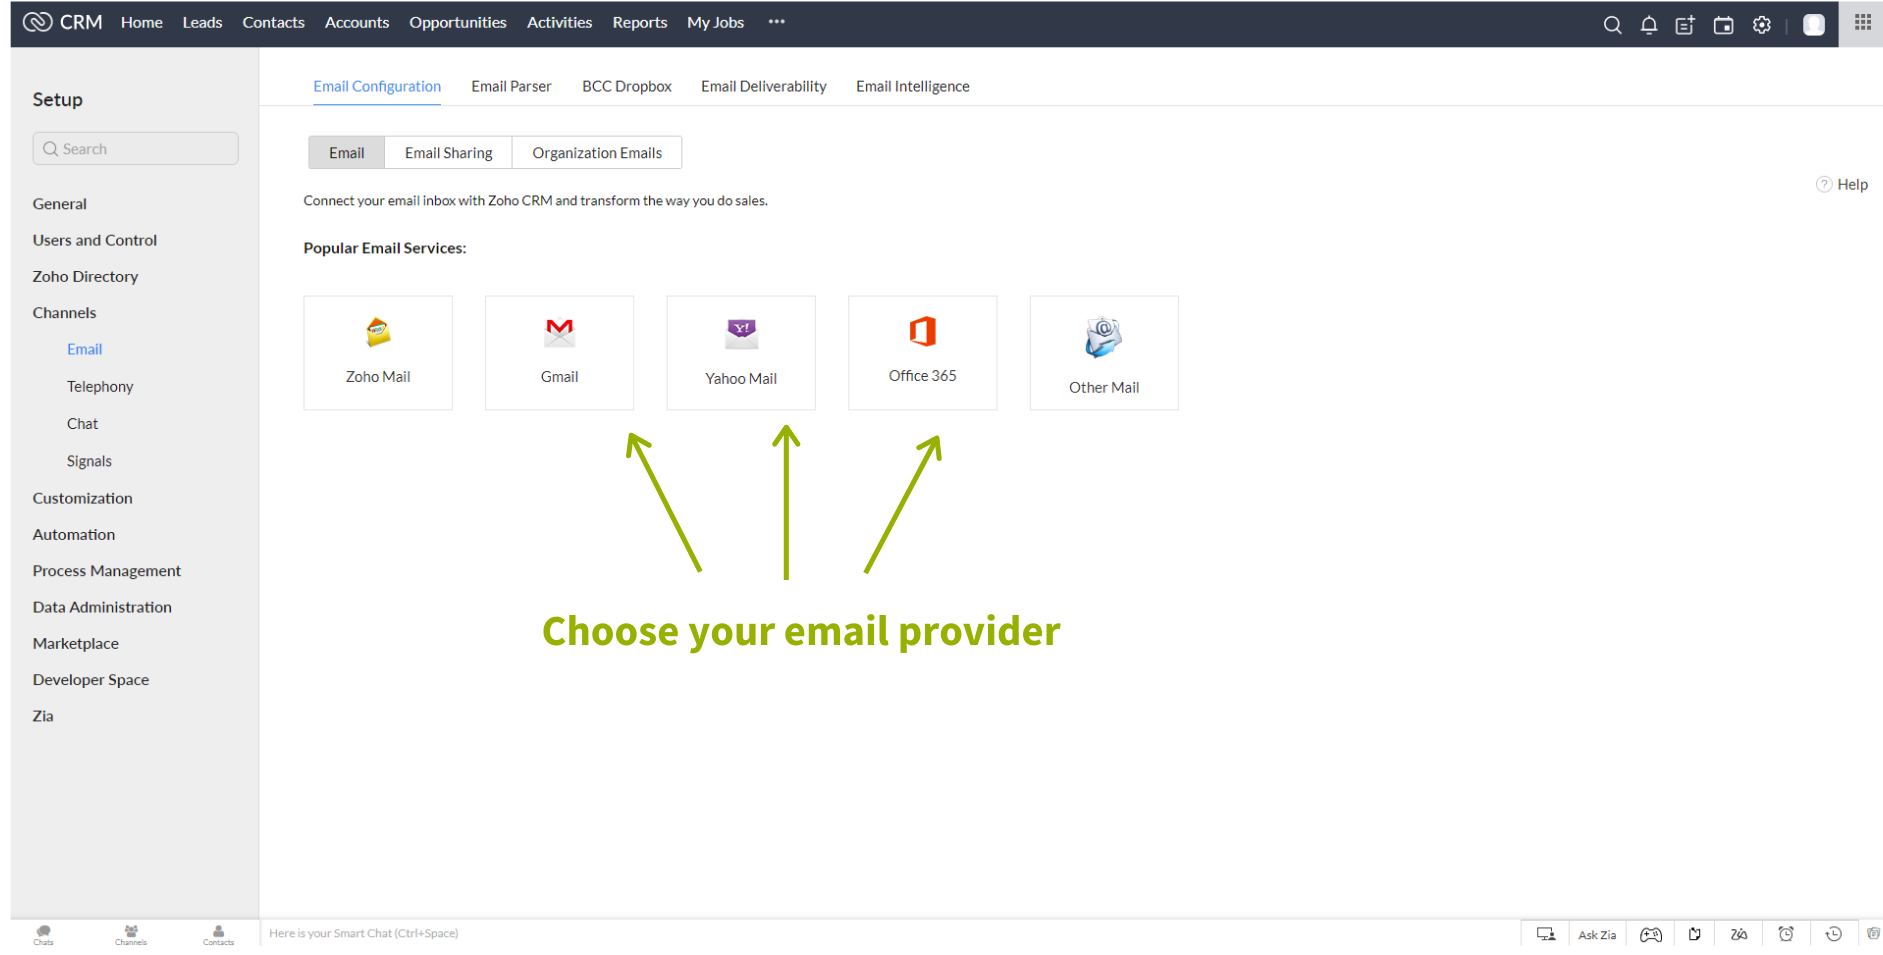
- Select the appropriate email service. For this example, we’re going to use Gmail.
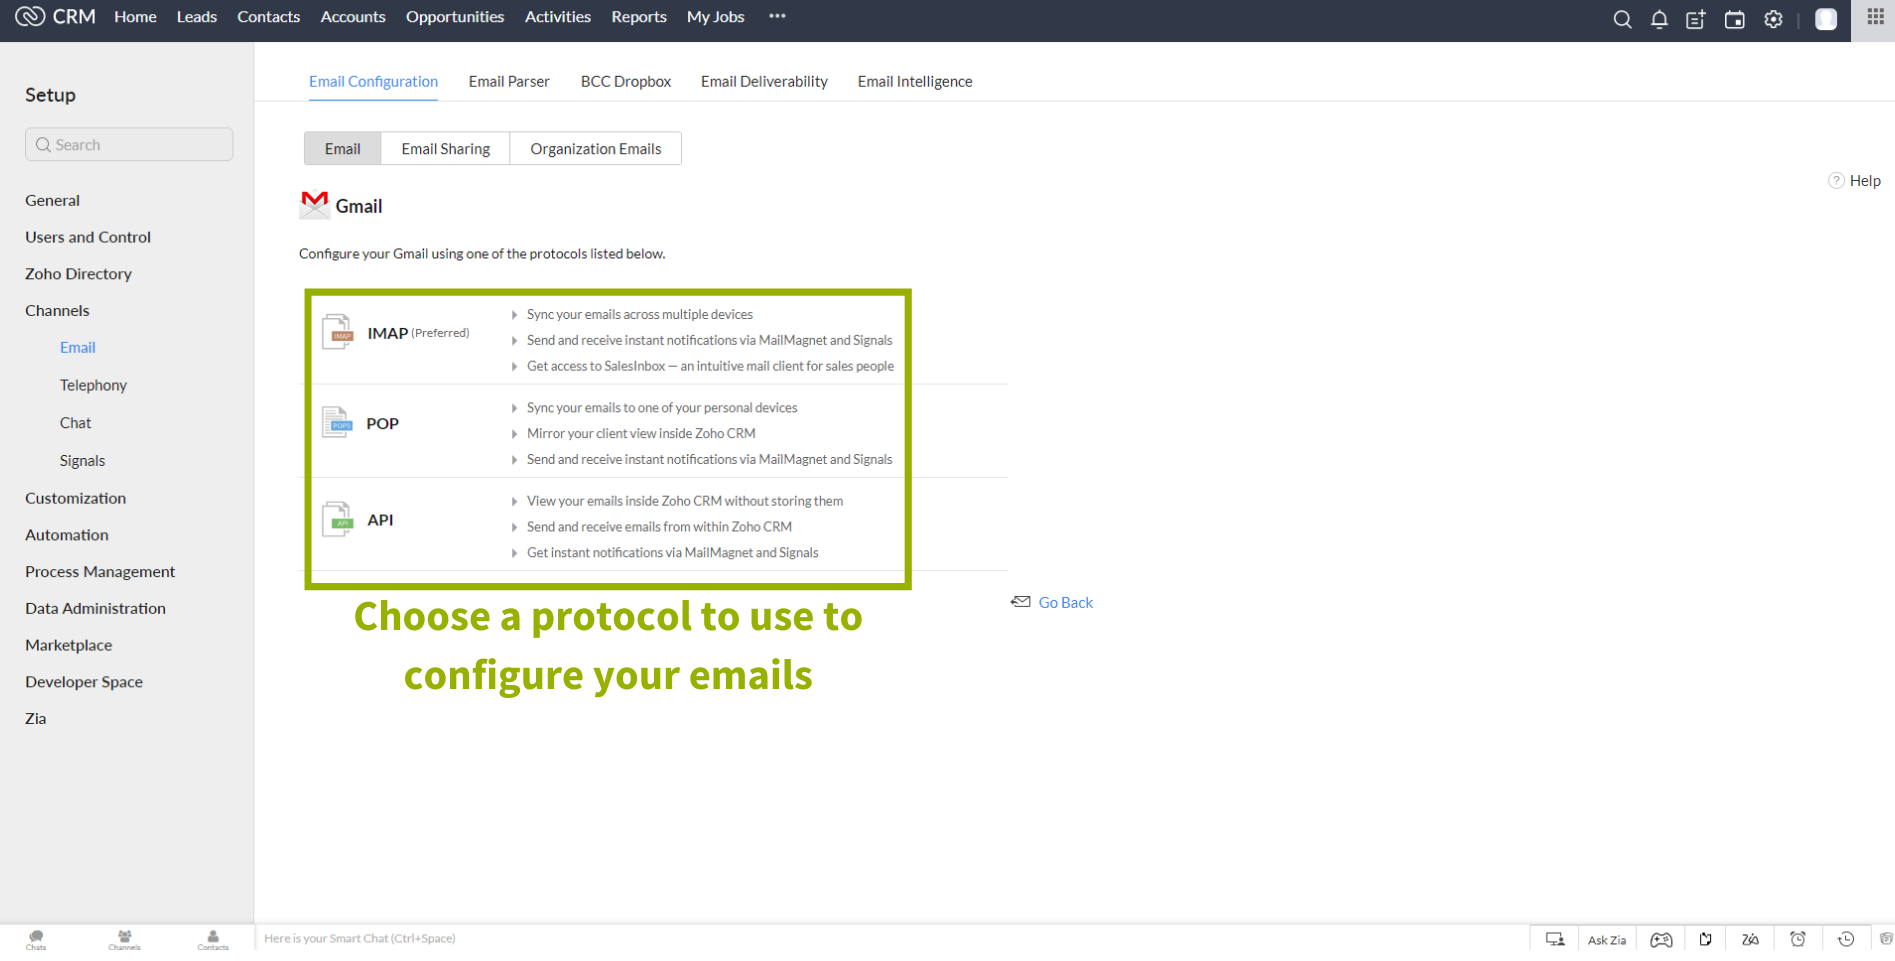
- Now select your preferred protocol. We always recommend using IMAP.
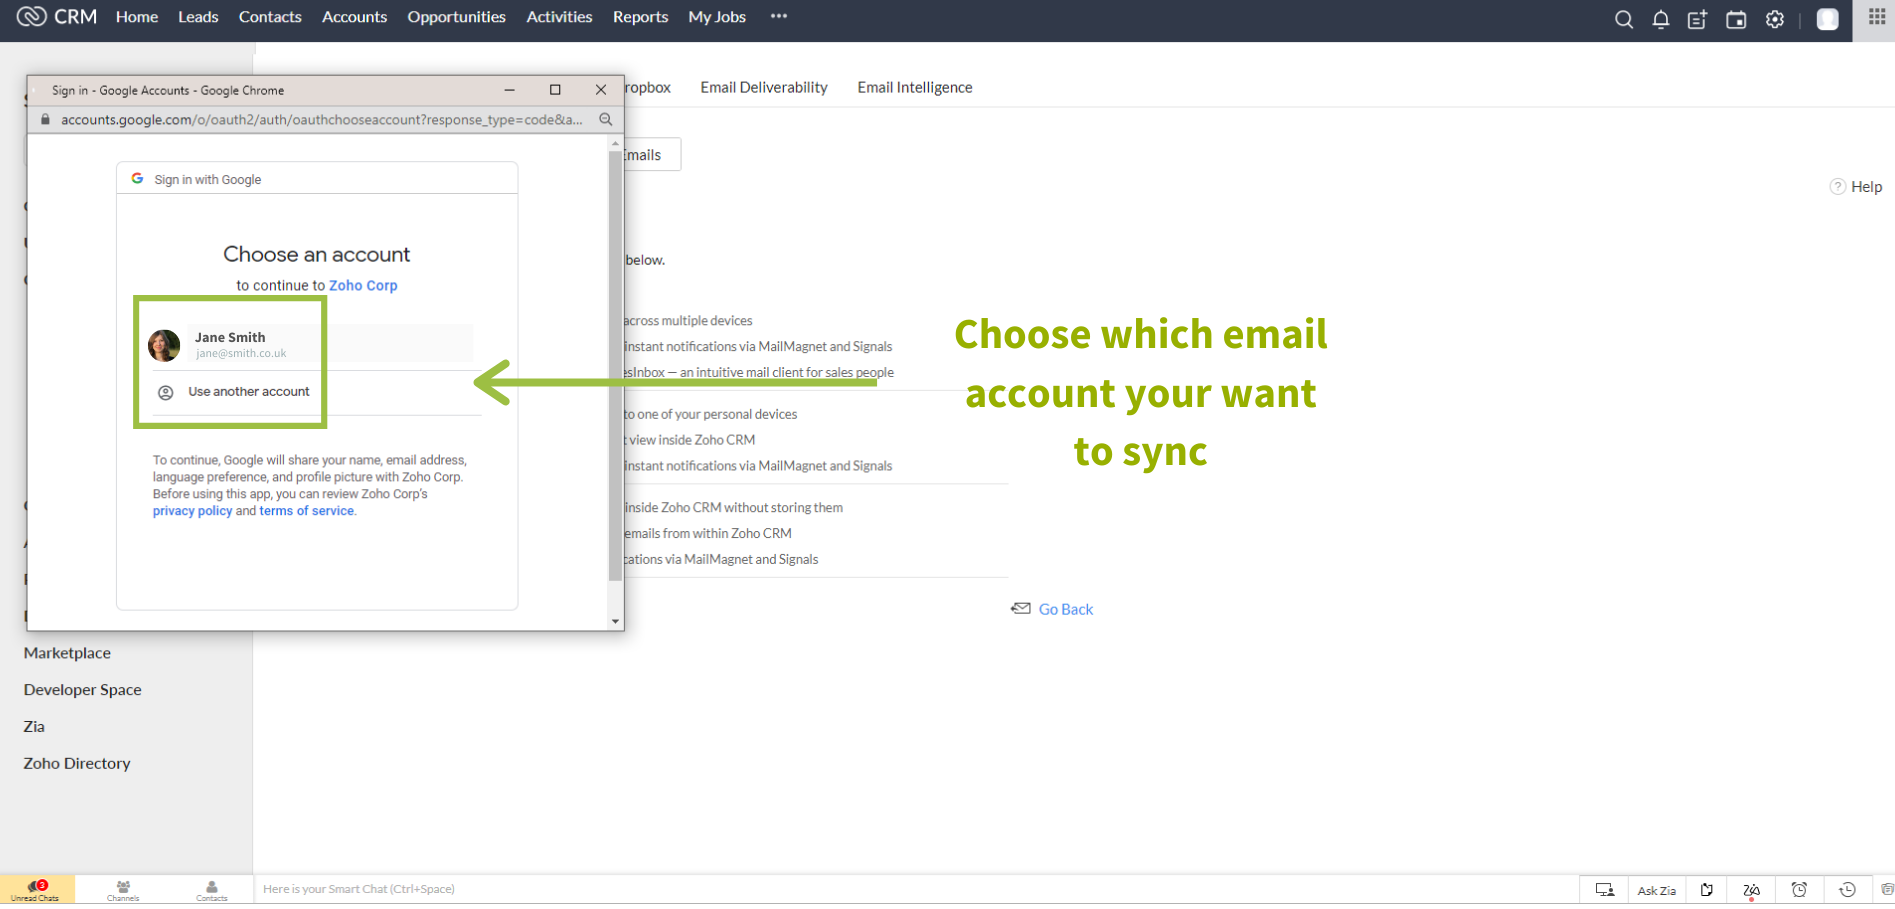
- Once the protocol has been selected a window will appear, asking you to choose which Gmail account to sync.
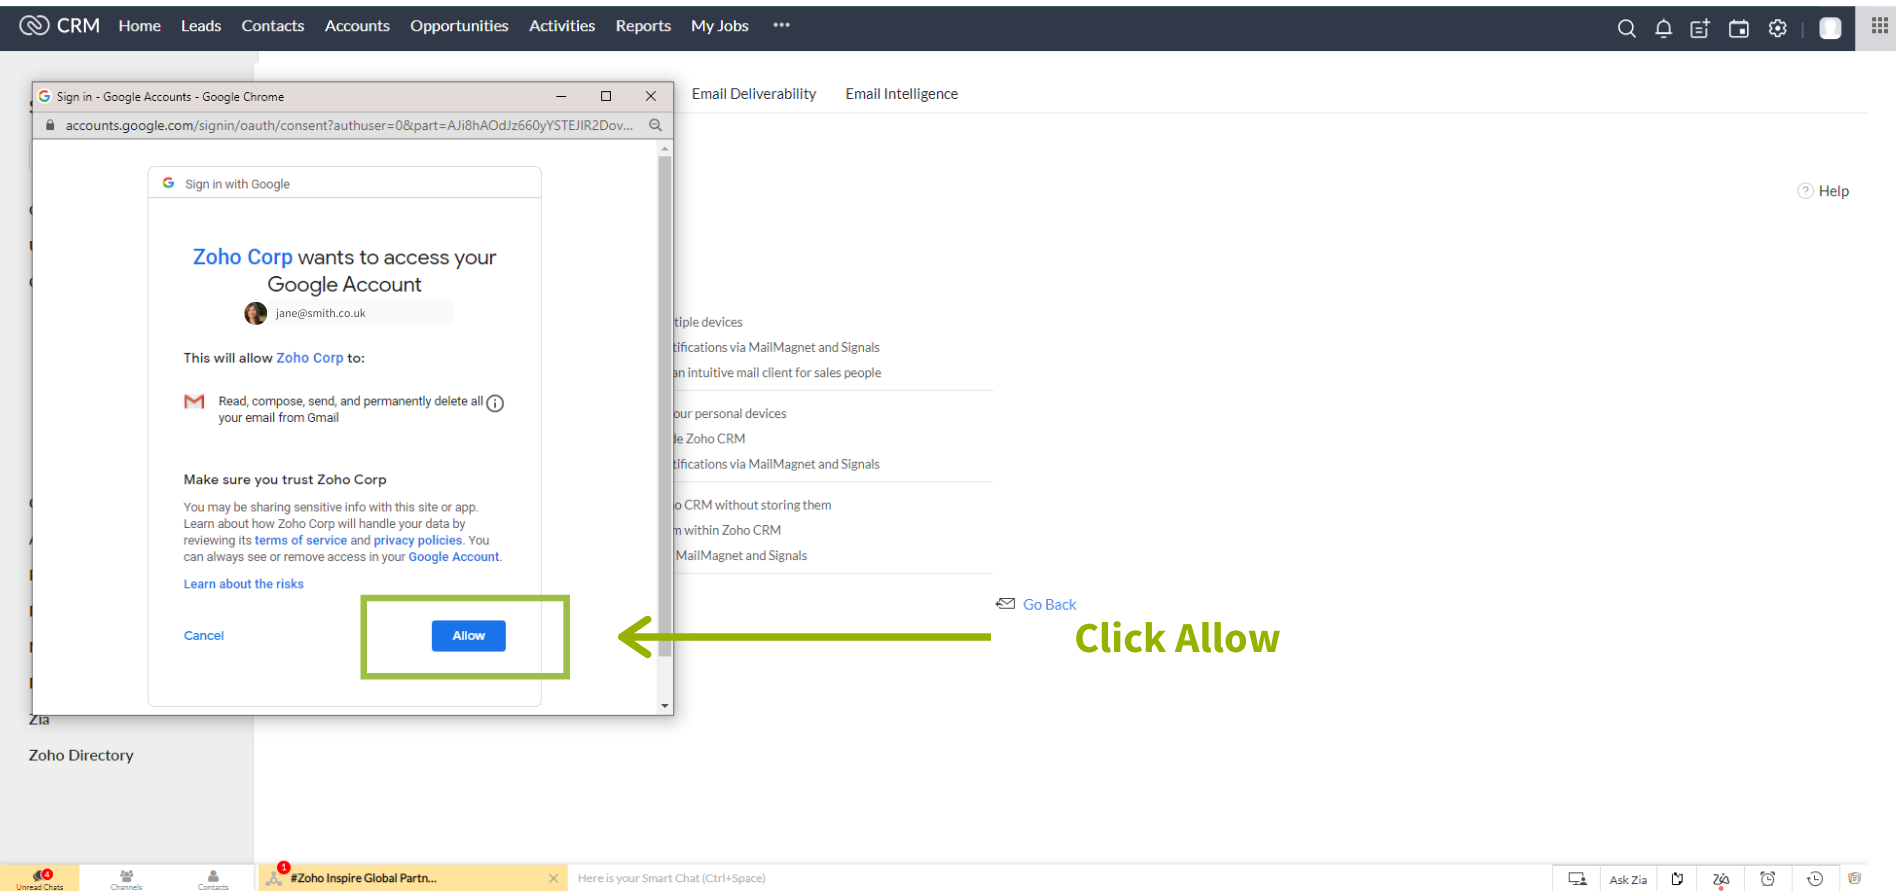
- It will then ask you to allow Zoho Corp access to your Gmail account. Select Allow and the window will close itself and you will be taken to an IMAP integration page.
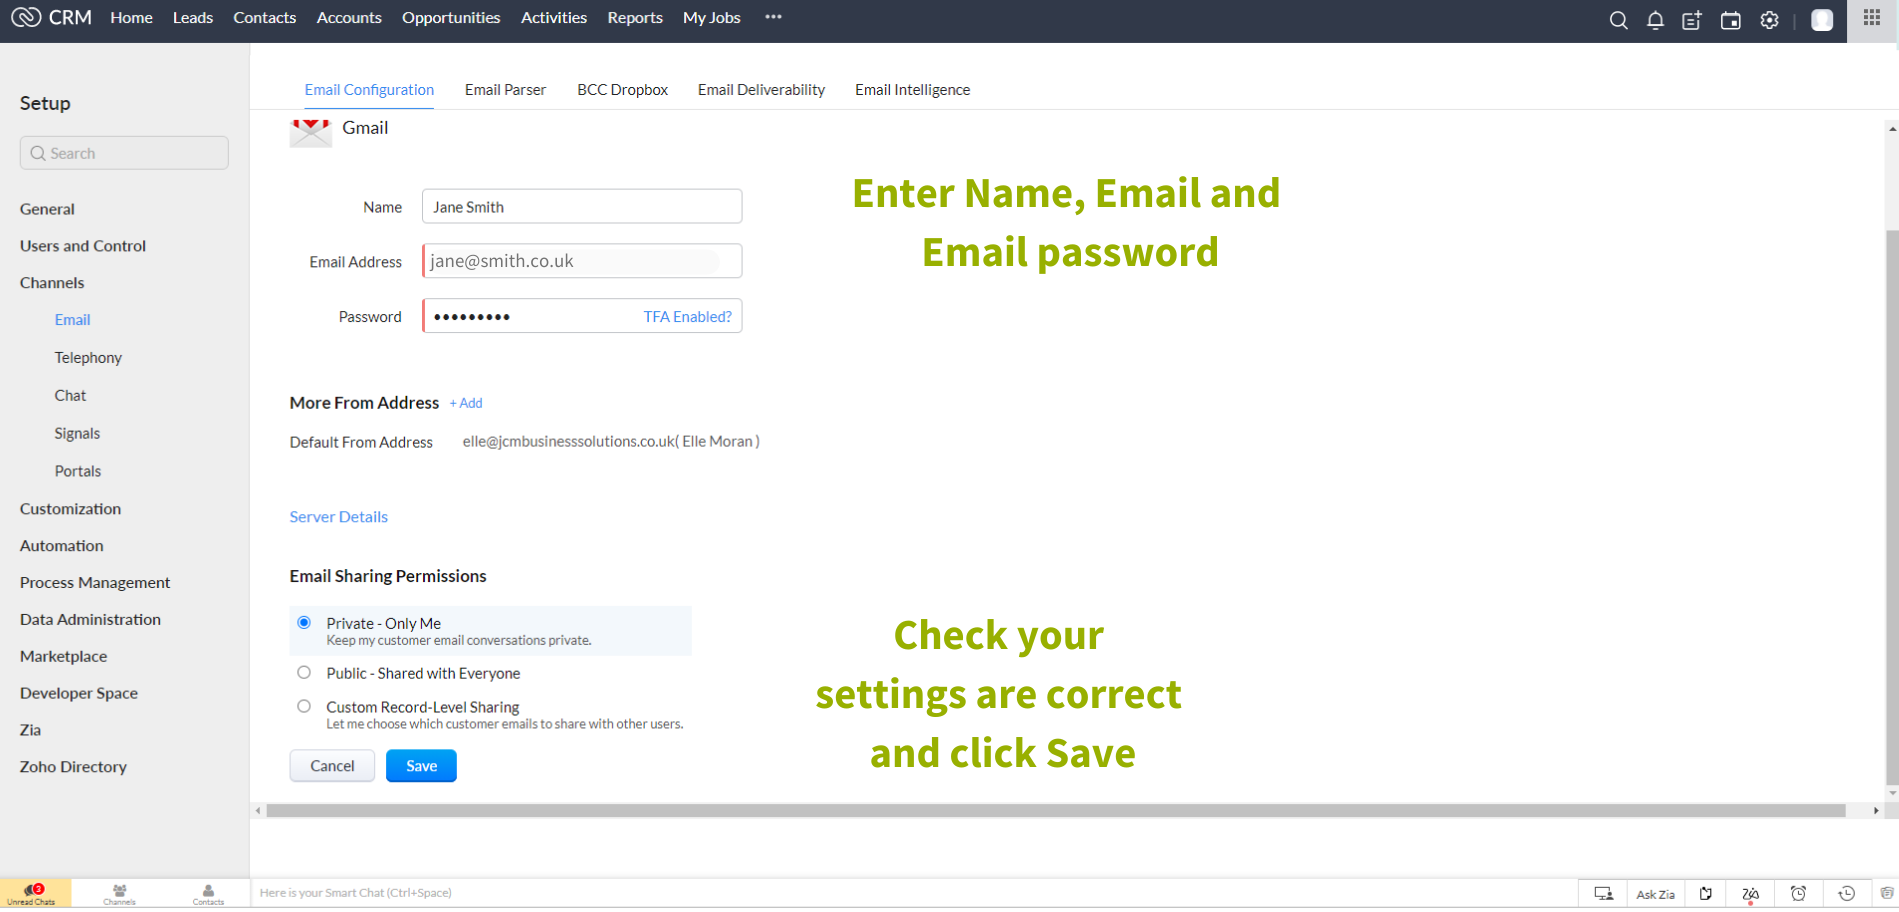
- From here, enter your Name, Email address, and Email Password and set your Email Sharing Settings. Click Save and your email sync will be initiated.
Now, anytime you or your team deal with a client, prospect, or lead those emails will be synced and stored within your CRM against that client’s record, and you have a full picture of any project.
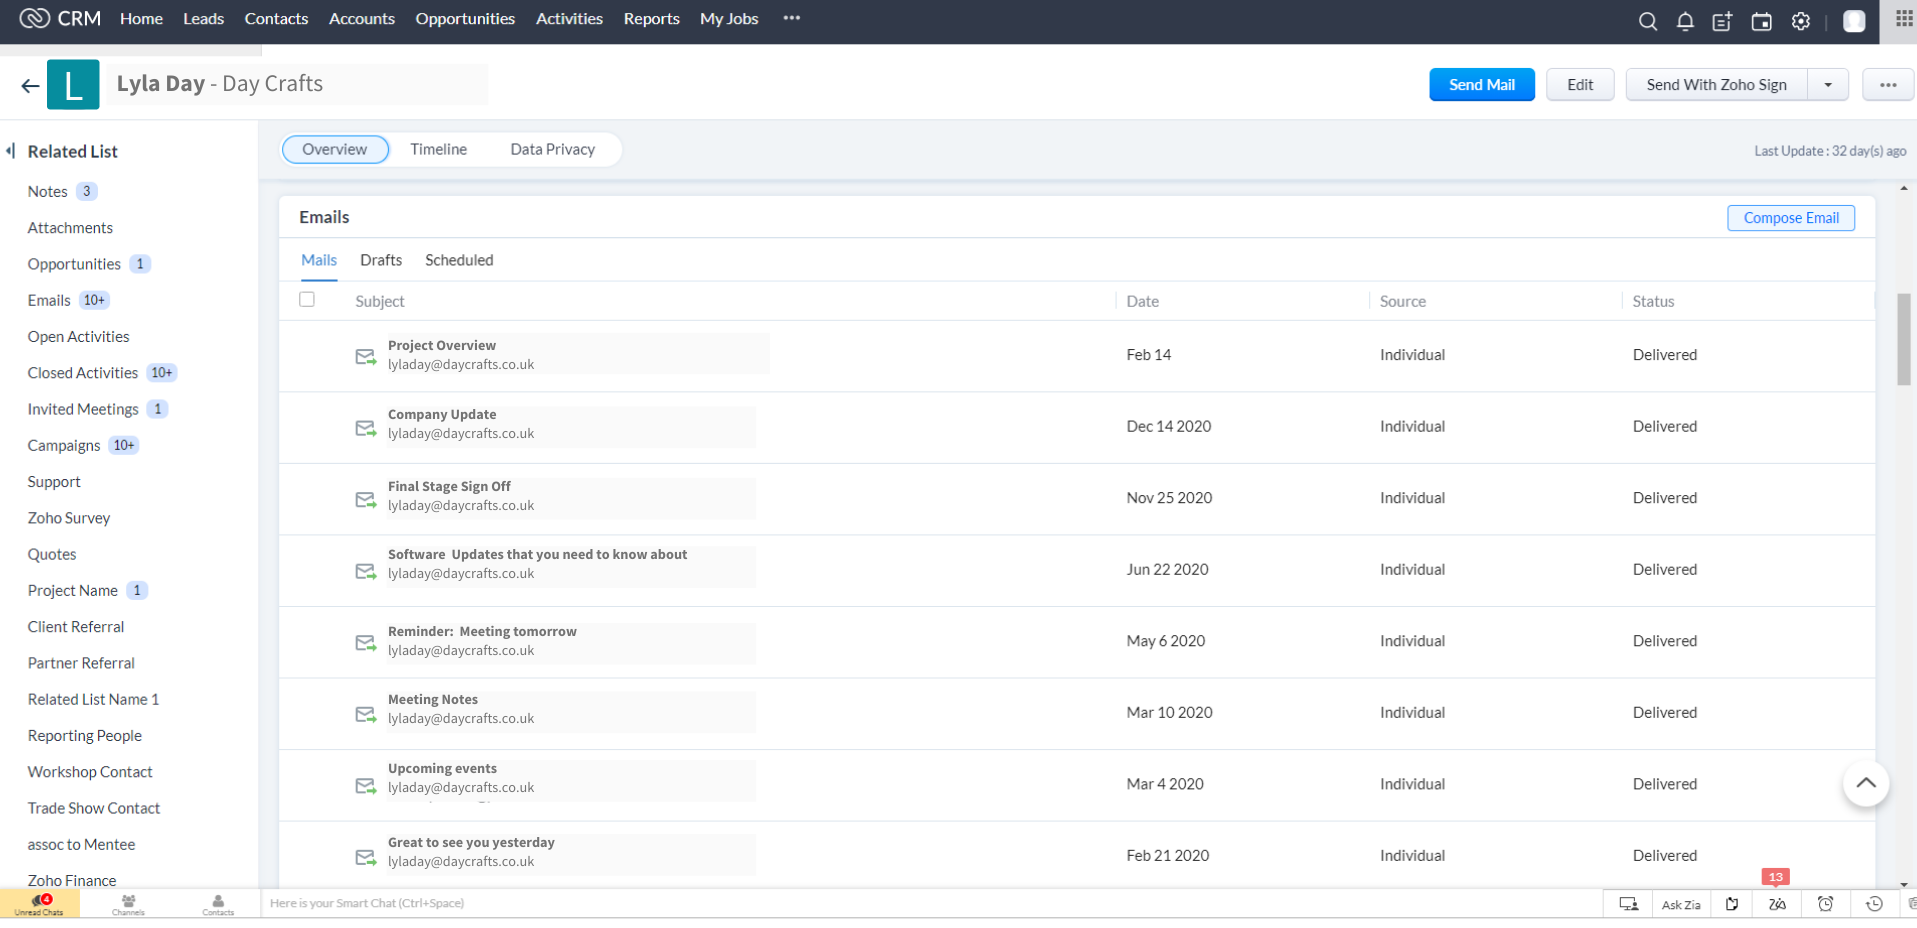
The next thing we’re going to look at is the Email Templates. Email templates allow you to template an email that you send out regularly. For example, if you have specific communications that go out during each stage of a project, sign off points or proposals for example, these would be set up, ready and waiting in your template folder, so that you don’t need to rewrite the same email each project, when the only a few details actually need changing.
Email templates can be sent to individuals, as a mass action to multiple records or be incorporated into an automated workflow.
Clean up your templates
Firstly, let’s talk about cleaning up your existing Email Templates. This couldn’t be easier!
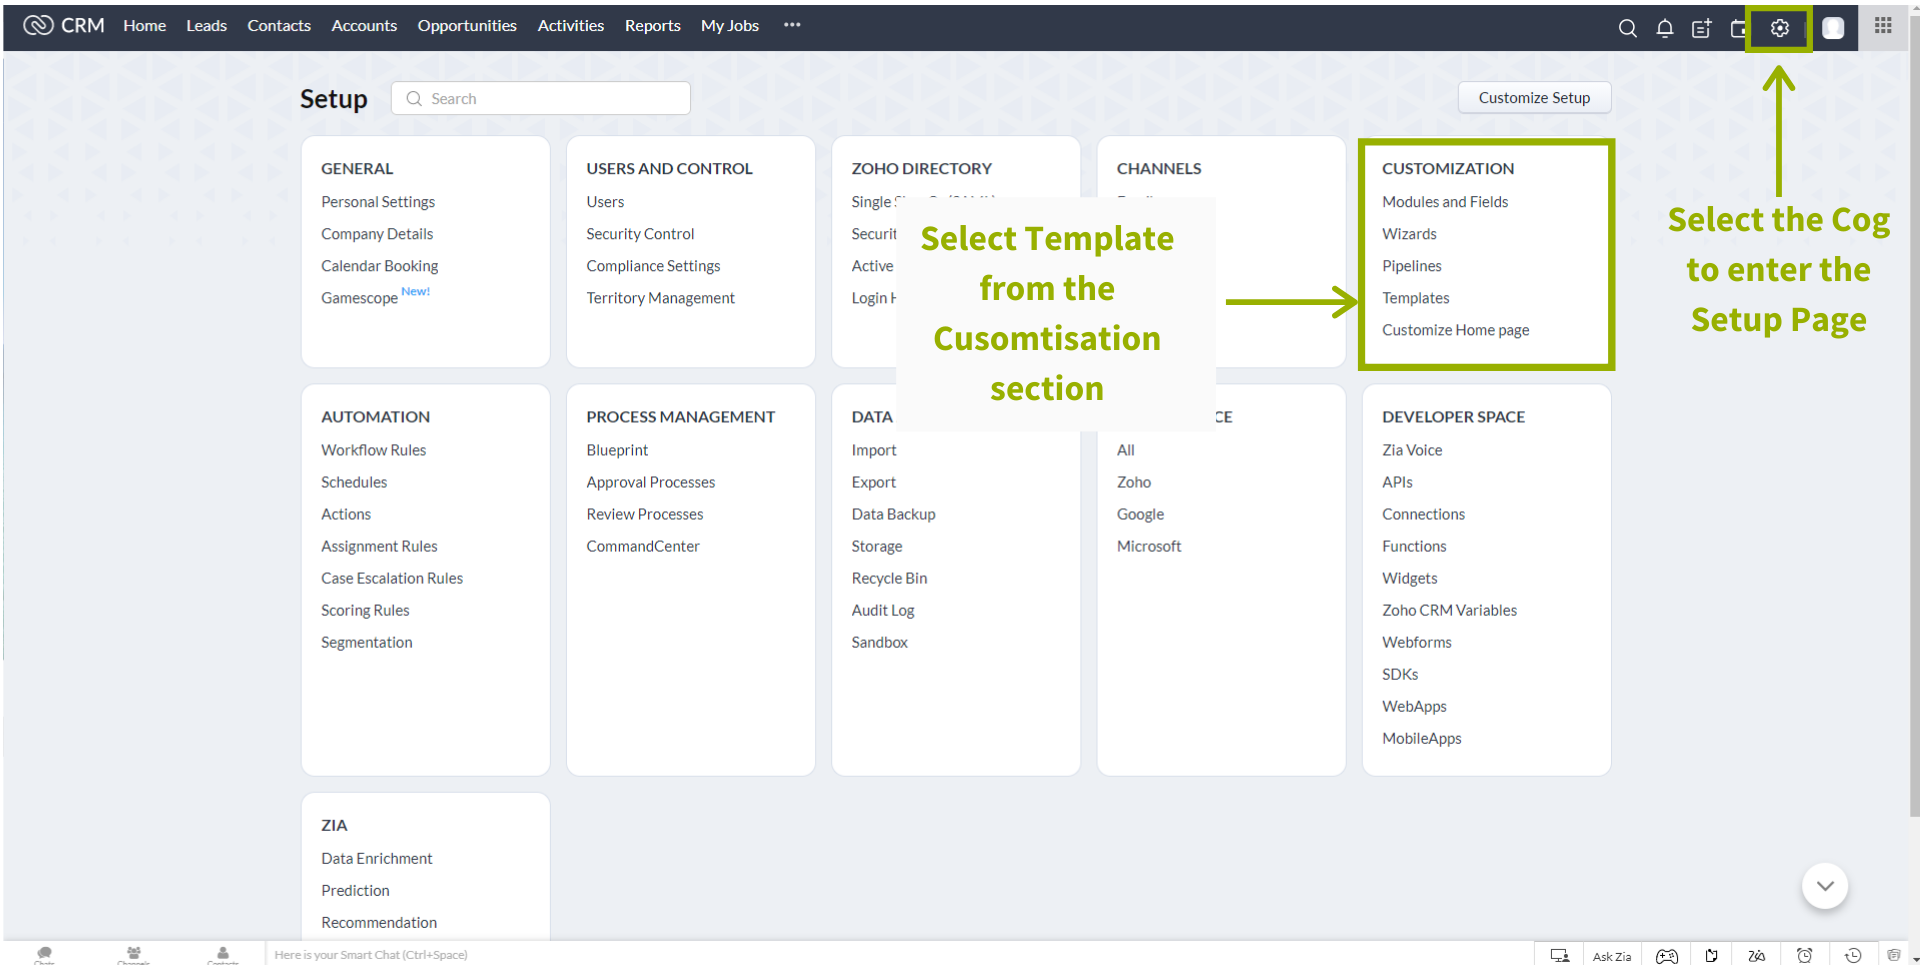
Head to the cog in the top right and select Templates from the Customisation section. This will open up your Email Template dashboard.
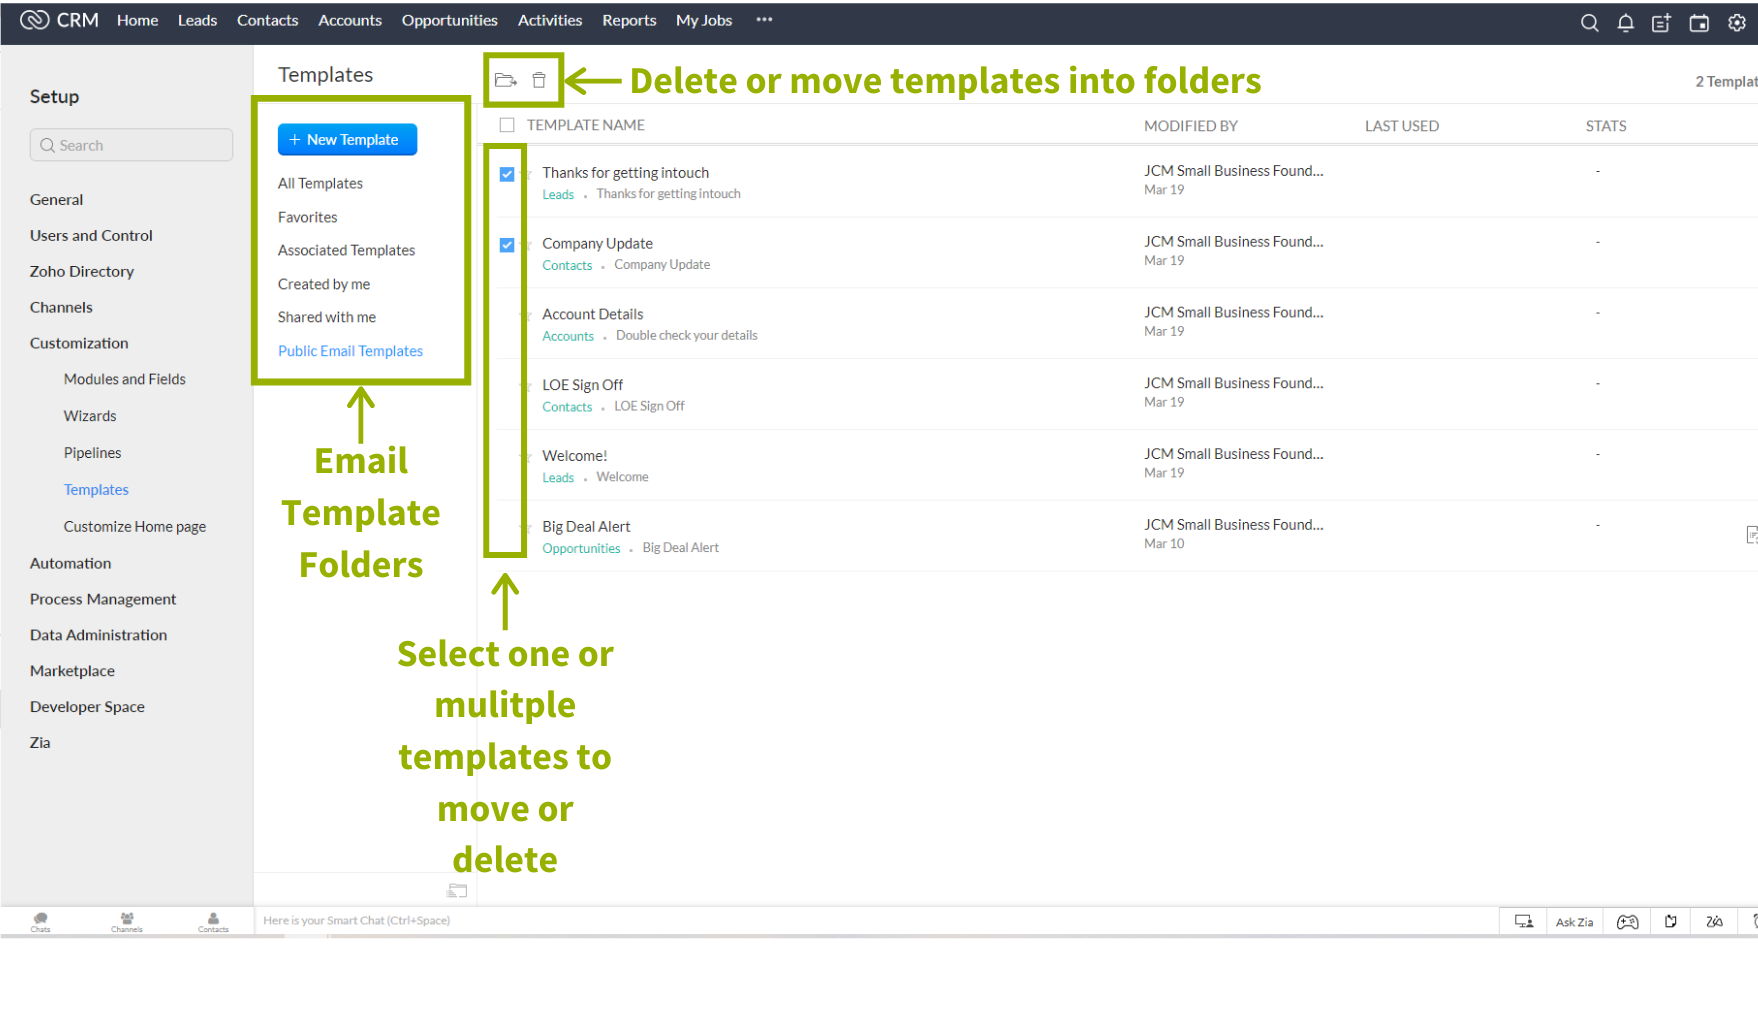
Your Email Template Dashboard will show you all your email templates. From here, you can delete any you don’t need, arrange templates into folders, and edit templates to keep them relevant and up to date.
To delete templates, just select the template using the tick box and click the Bin icon.
To move templates into folders, select the template/s you want to move into a folder, click the folder Icon, either select an existing folder or create a new one then click Create and Move. This will group your chosen templets into 1 folder.
To edit a template, simply click the template to open and make any changes you need to.
Create an Email Template
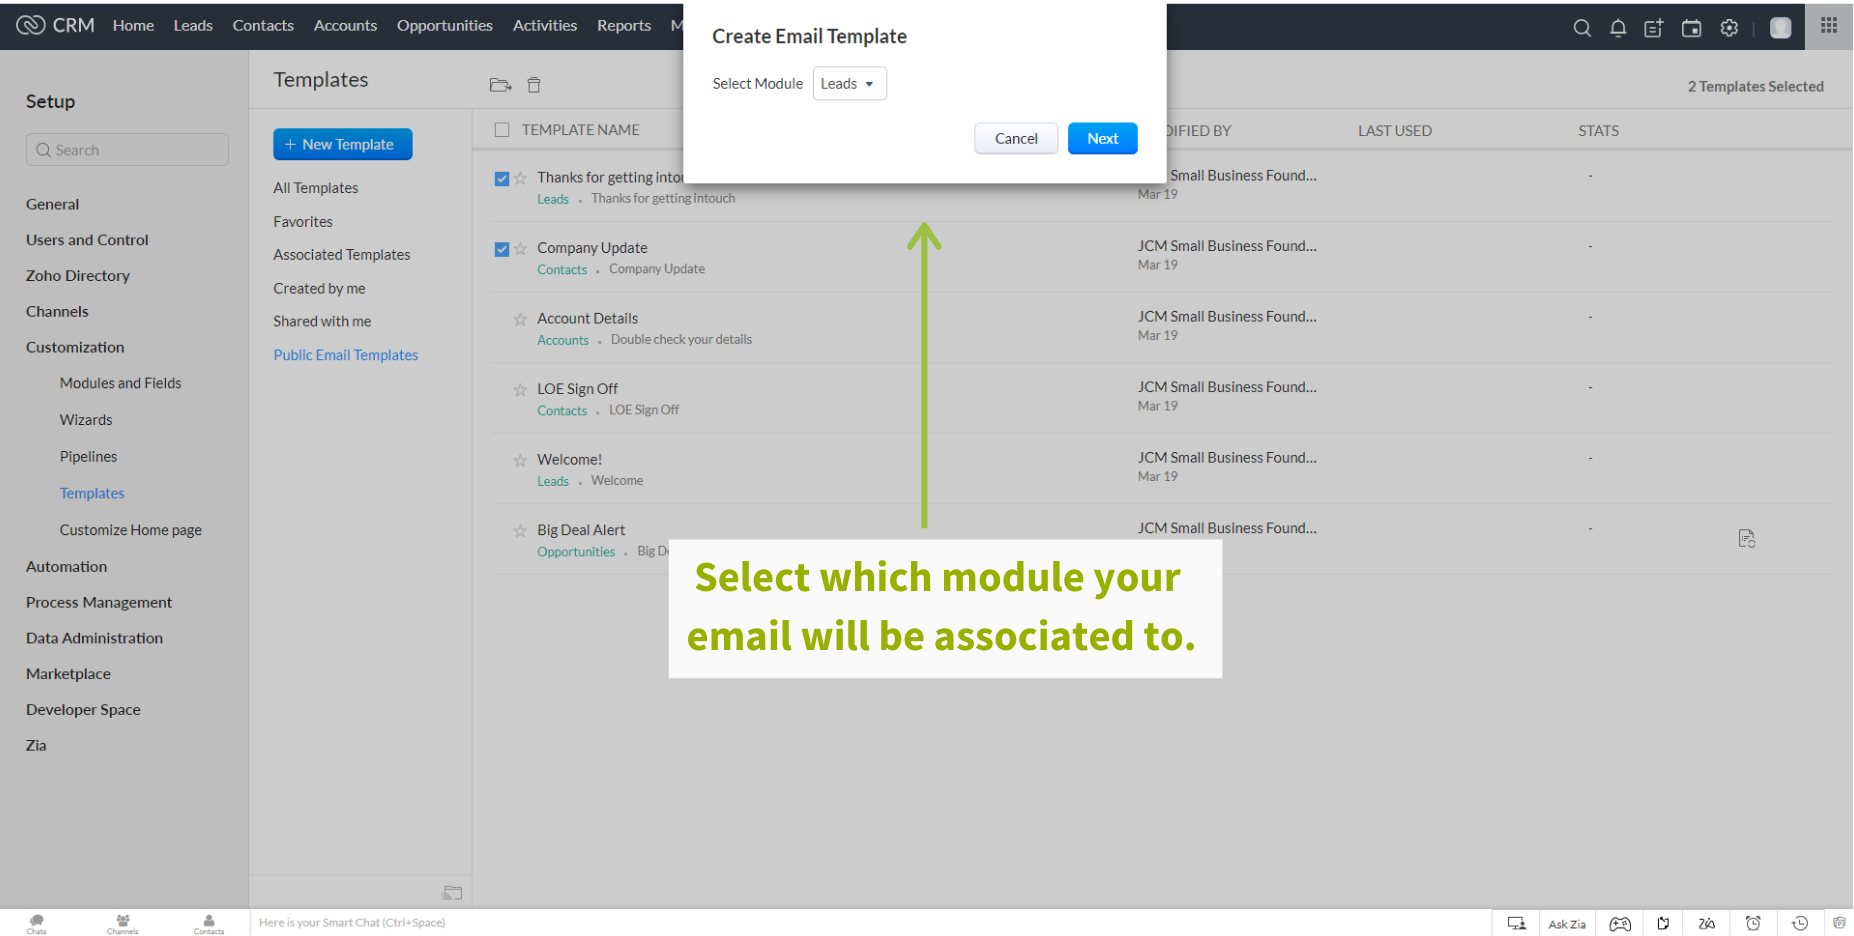
To create a new email template, just head to your Template Dashboard and select New Template.
Email Templates are module-specific, so you’ll need to select a module that you want your email template associated with. For this example, we’re going to use Leads.
Once you’ve selected your Module, click Next.
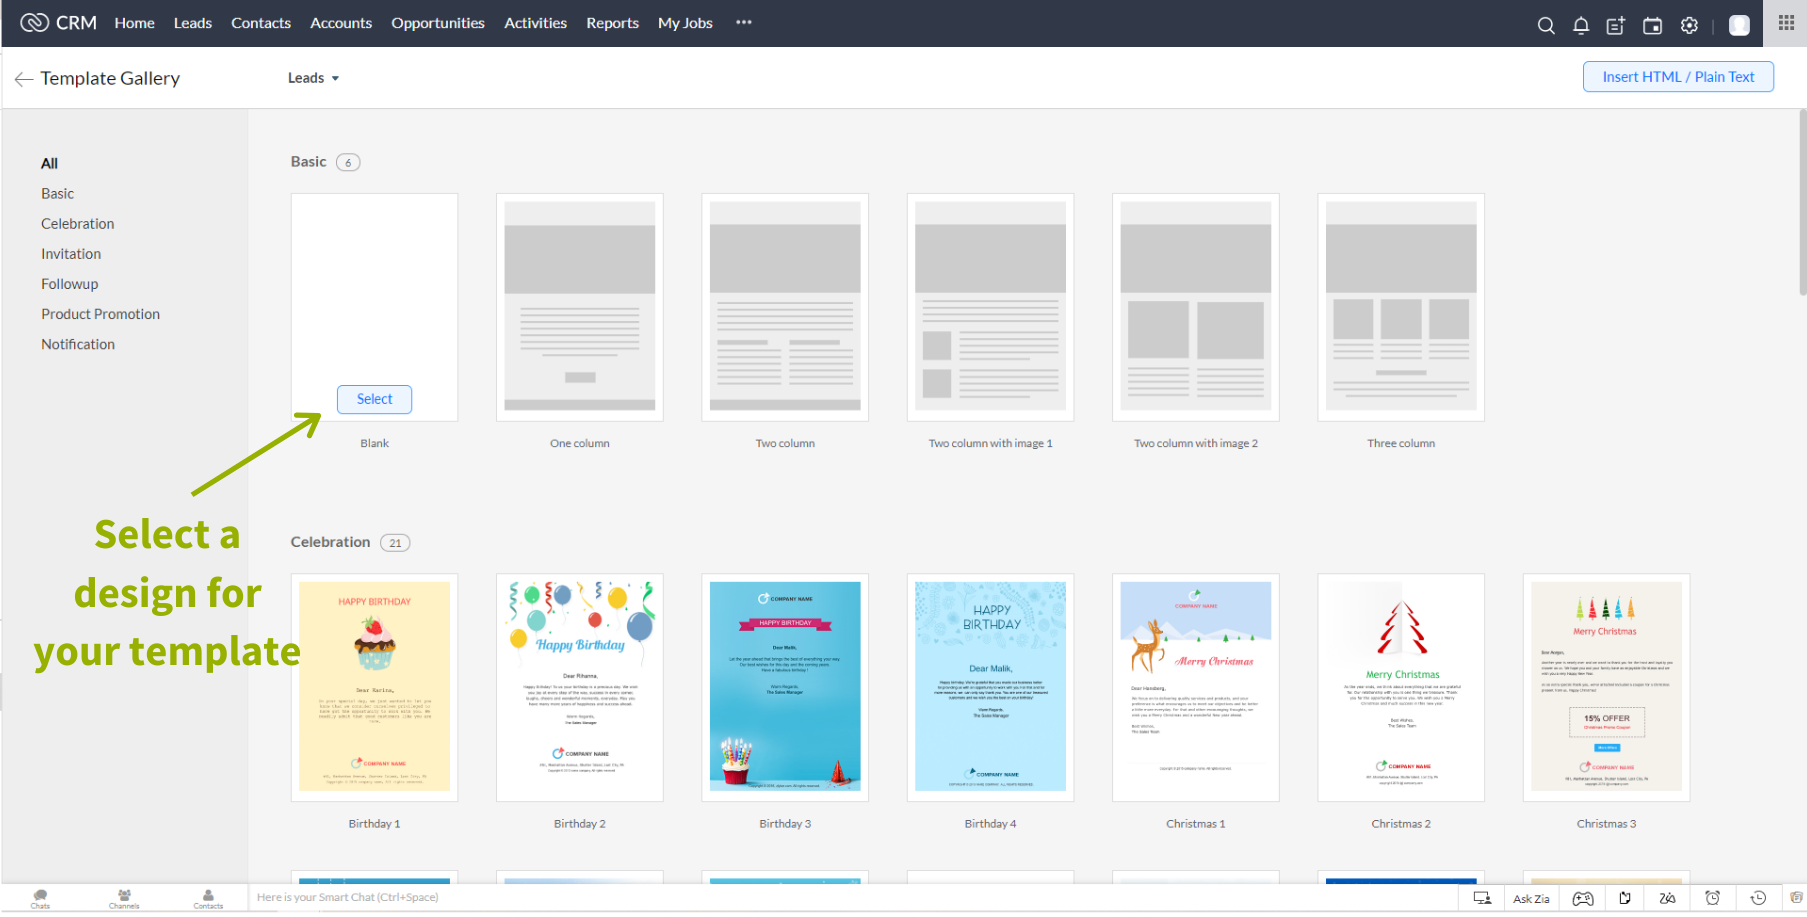
You can now choose your template design. Either choose a basic design or one of Zoho’s predesigned templates. You can click on the design to preview it in full before you select it for your template. All template designs are fully editable.
For this example, we’re going to choose a Blank template.
Once you’ve picked a design, you can now edit your email template.
Give your Template a name and subject line in the top left of the screen. The Template Name will only be visible to you, not the recipients.
Drag and drop the components you want from the left-hand side. Use these components to add your own copy, images, and links.
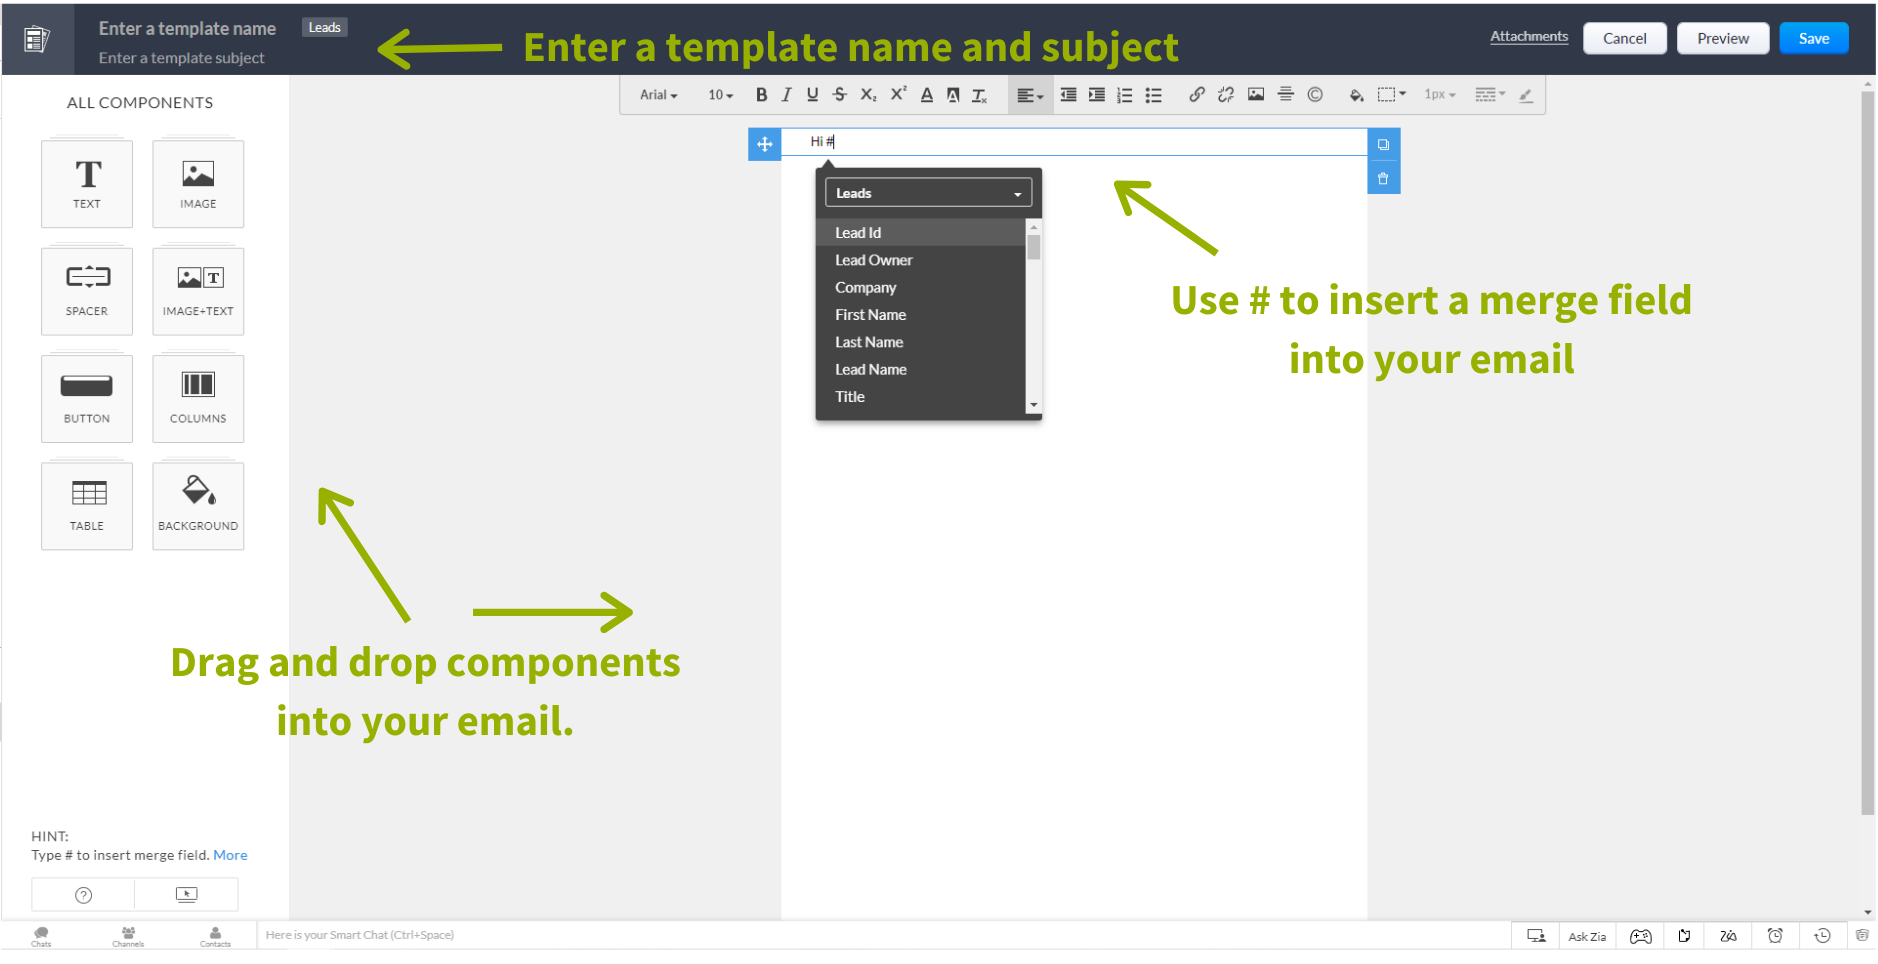
When writing a copy, add merge fields using the # key. For example, if you wanted to use each person’s first name to greet them in the email, you would type Hi # and choose the First Name field from the list of fields that come up. In your copy, the greeting will now look like this:
Hi, ${Leads.First Name}
You can merge information from almost any field within your chosen module.
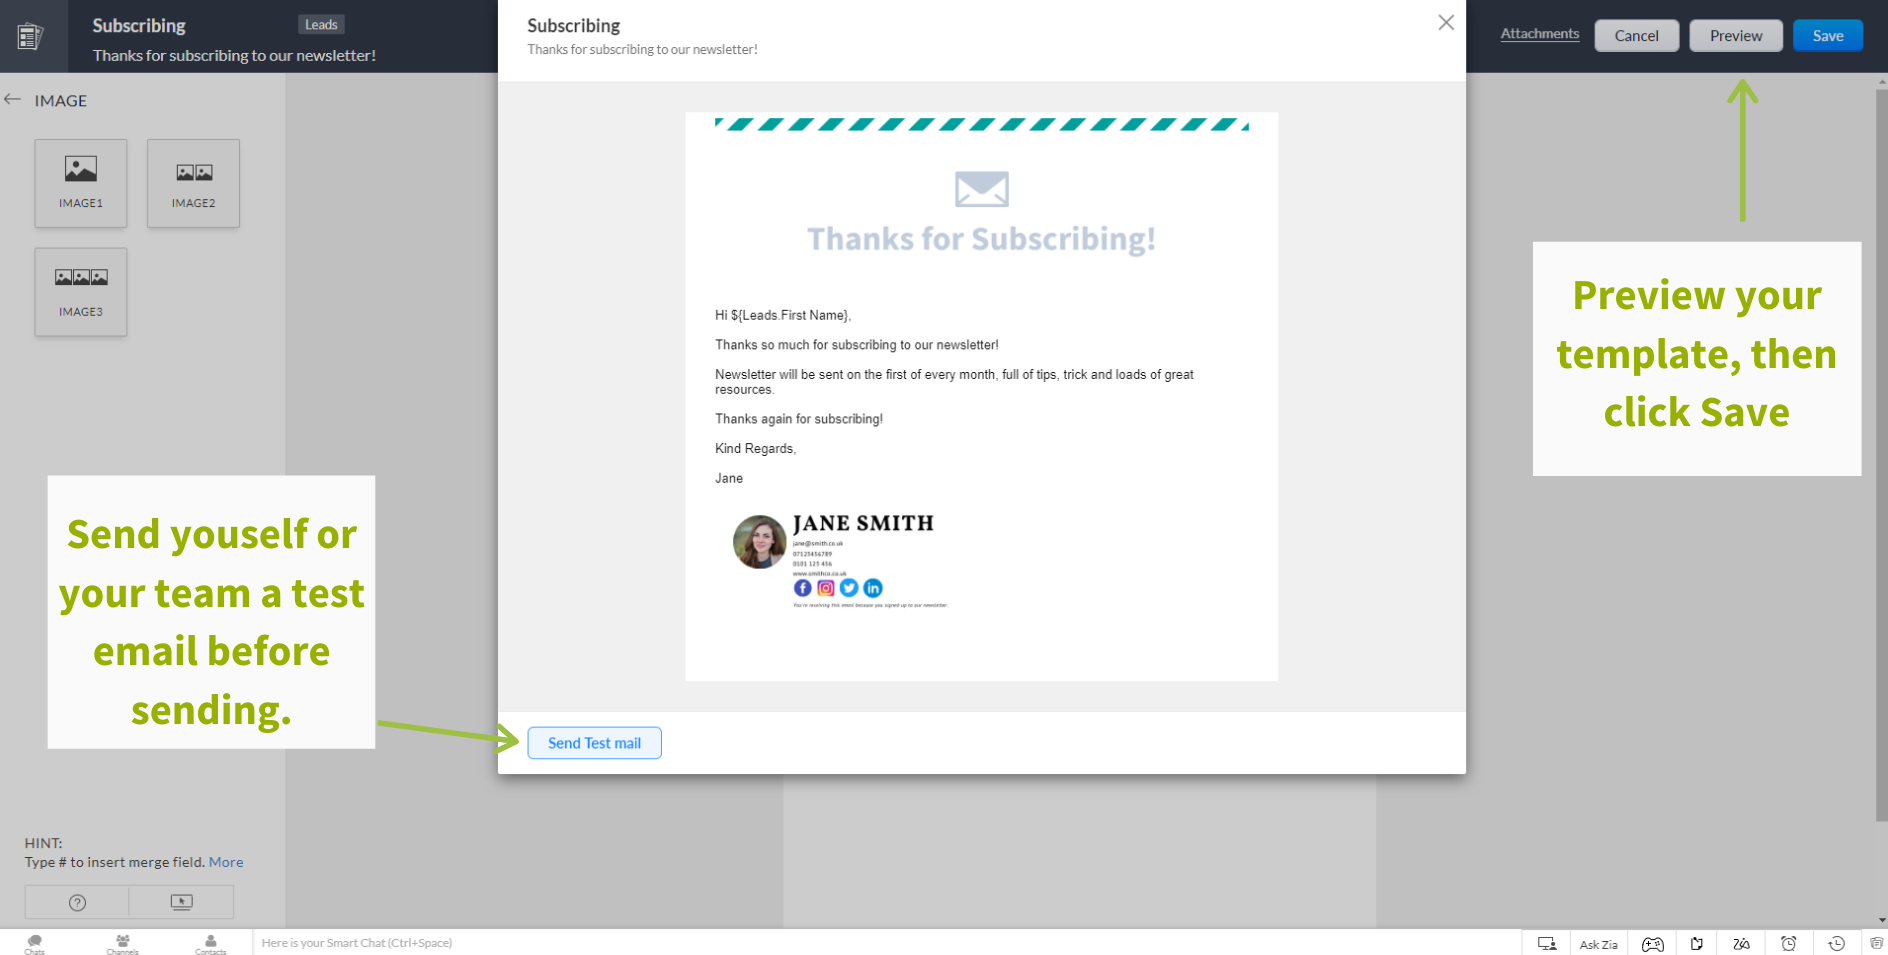
Once you’ve created your template, you can Preview your design, send either yourself or your team a Test Email, and then Save the design.
When you Save your design, make sure you save it into a folder to get your templates organised.
And that’s it for creating your email template!
Using Email Templates
As I said earlier, you can send email templates to individuals, use them as a mass action to send to multiple records, or incorporate them as part of an automated workflow. Here’s how you can send an email template in each method.
Sending to an individual
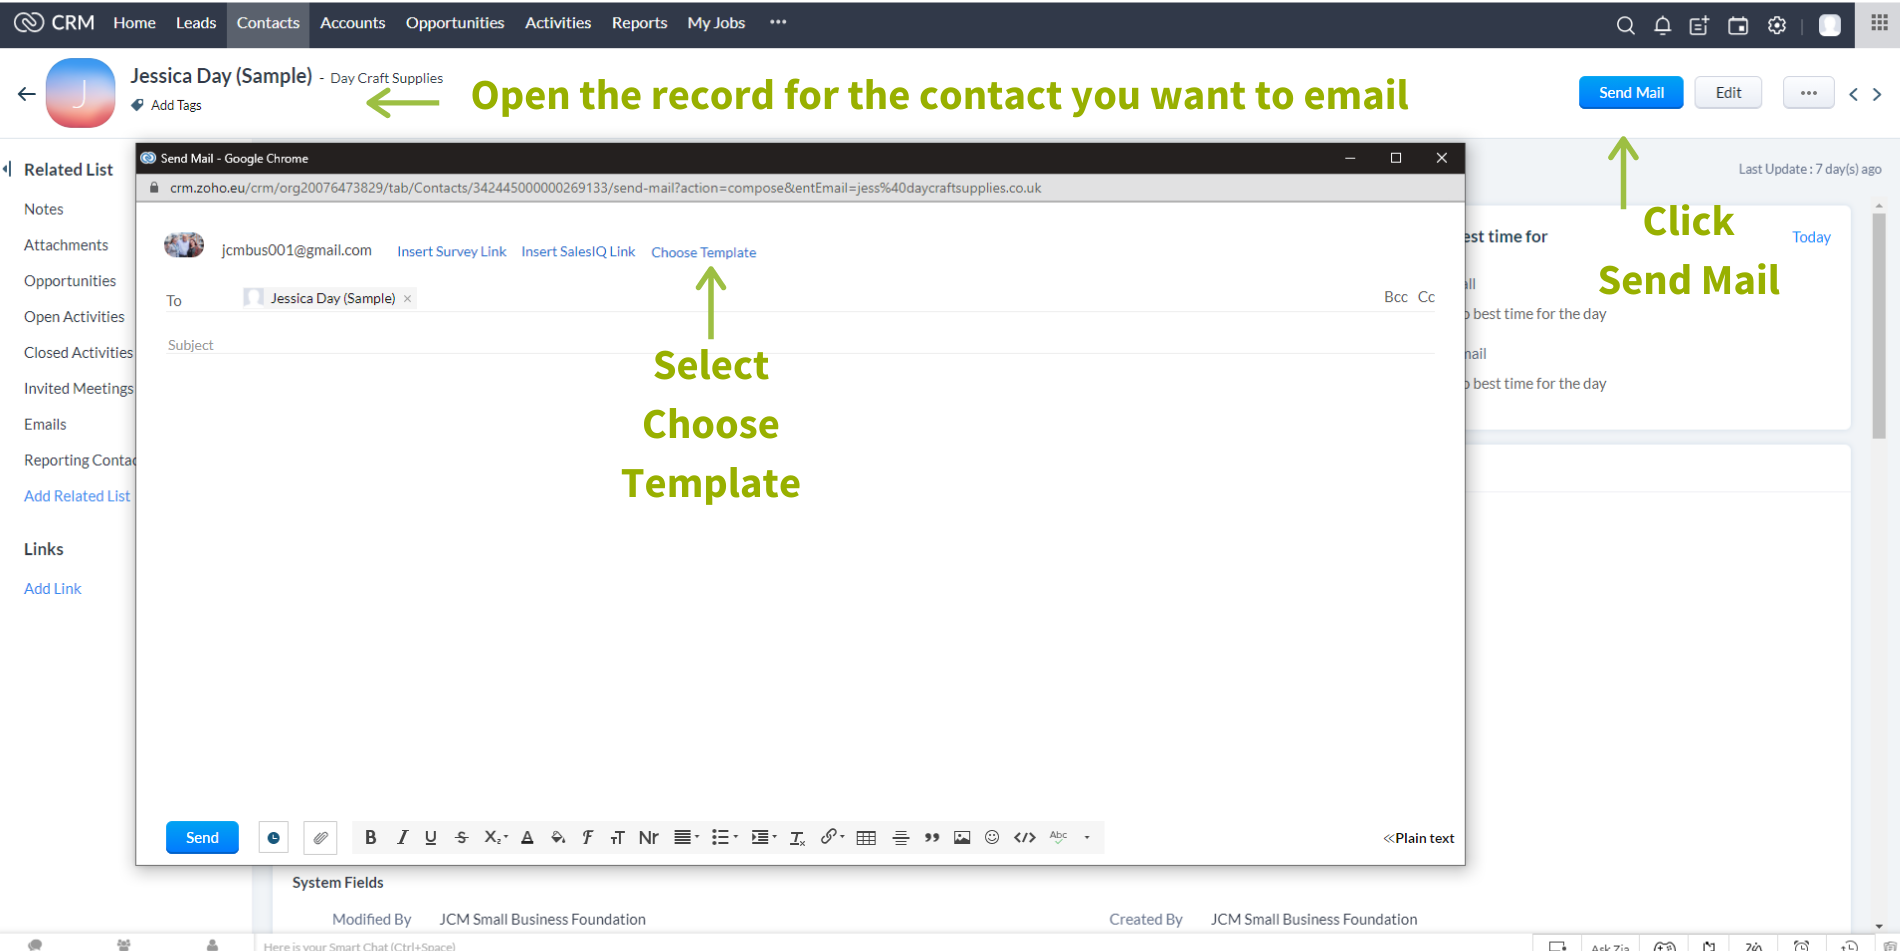
- Find the contact you would like to send the email to, open their record and select Send Mail
- In the email window, select Choose Template and select your template from the list presented. Remember, only the templates you have created for that module will appear.
- Check everything is correct with your template and hit Send.
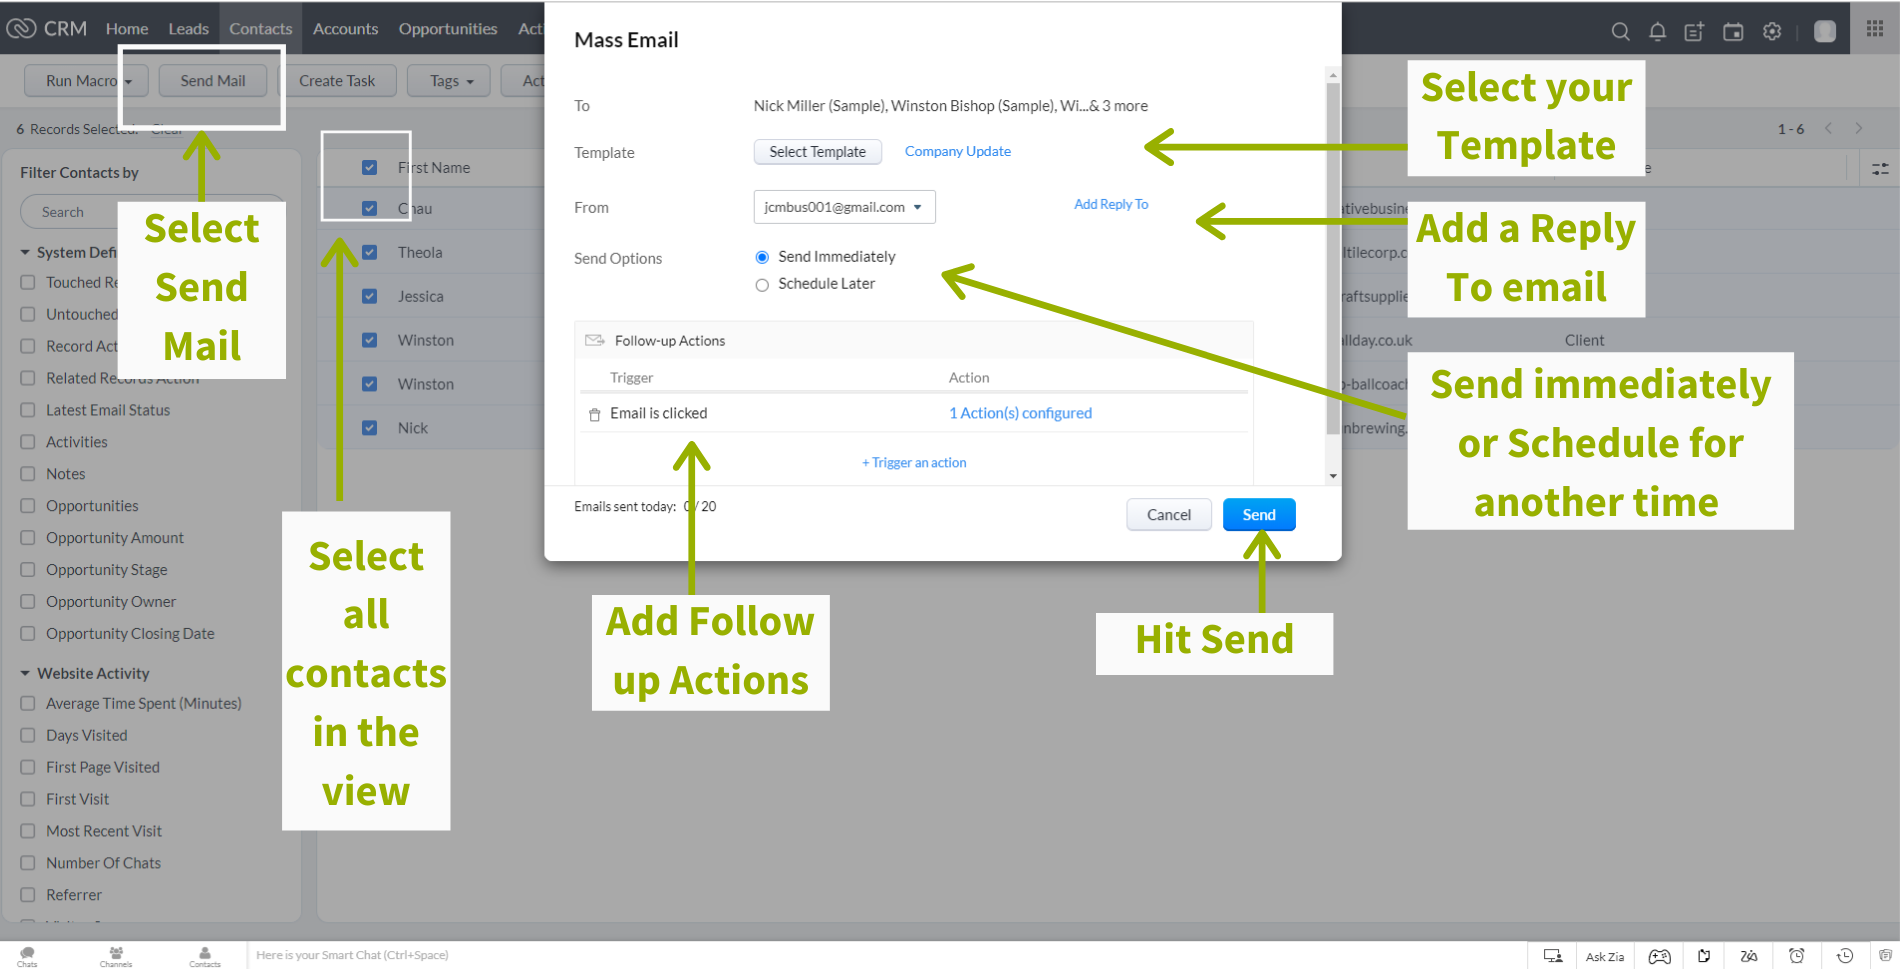
Send Mail to multiple records at once as a Mass Action
- Use a filter or custom view to pull together the list of people you want to send the email to.
- Select all in the view or filter by selecting the tick box at the top of the first column.
- Select Send Mail and choose the template you would like to send.
- Set a Reply-To email, click Send Immediately or Schedule Later and set any Follow-Up Actions.
- Check everything is right with the template, then hit send.
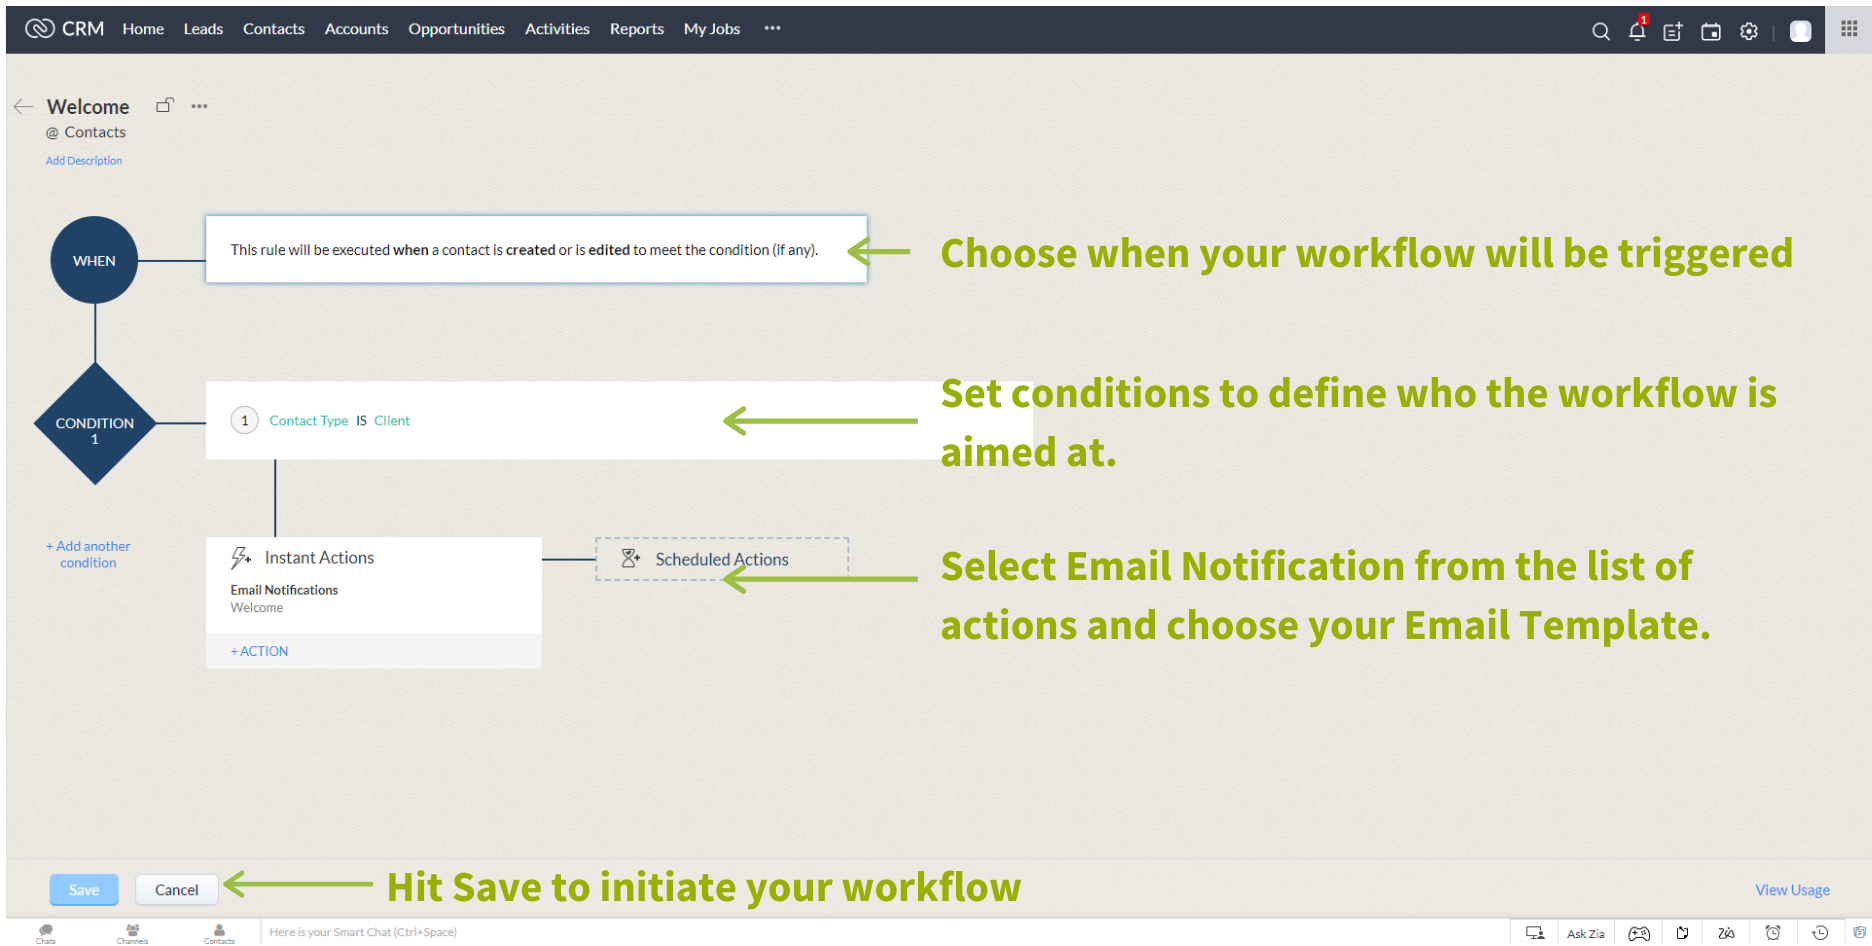
Send automatically using a Workflow
In this example, we’re going to send a welcome email that we’ve created in our email templates, to any new Client.
- Click the cog in the top right corner of the screen to enter the Setup Page, then select Workflow Rules from the Automation section.
- Click New Rule, then choose which module you want to associate your workflow to, and give your workflow a name.
- Choose when your workflow is triggered. In this example, we’ve selected when a record is created or edited.
- Then choose who you want the workflow to apply to by selecting the condition. In this example, the conditions are where the Contact Type is Client.
- Now choose what you want to happen when someone meets the predefined conditions. To send them an email template, select Email Notification.
- Select your Email Template and Save and Associate.
Now, anytime a record is created or edited to become a client, they will automatically be sent a welcome email.
Cleaning through the communication elements of your CRM is vital when it comes to keeping up to date with your clients.
2 key elements to start with are:
- Email Configuration
- Email Templates
Email Configuration
Check you and your users have your emails configured into your Zoho CRM. This allows you to have a better, overview picture of your client’s projects and opportunities.
Email Templates
Email Templates allow you to communicate with your clients, prospects and leads. Make sure you clean through any old or unused templates, sort templates into folders to keep them organised. You can then send Email Templates either to an individual, to multiple records at once as a mass action, or as part of an automated workflow.
If you would like to access a training video that takes you through Email Configuration and Email Templates in a real-life Zoho CRM system, click the button below to join our FREE Facebook Group.